Training your ML experiment
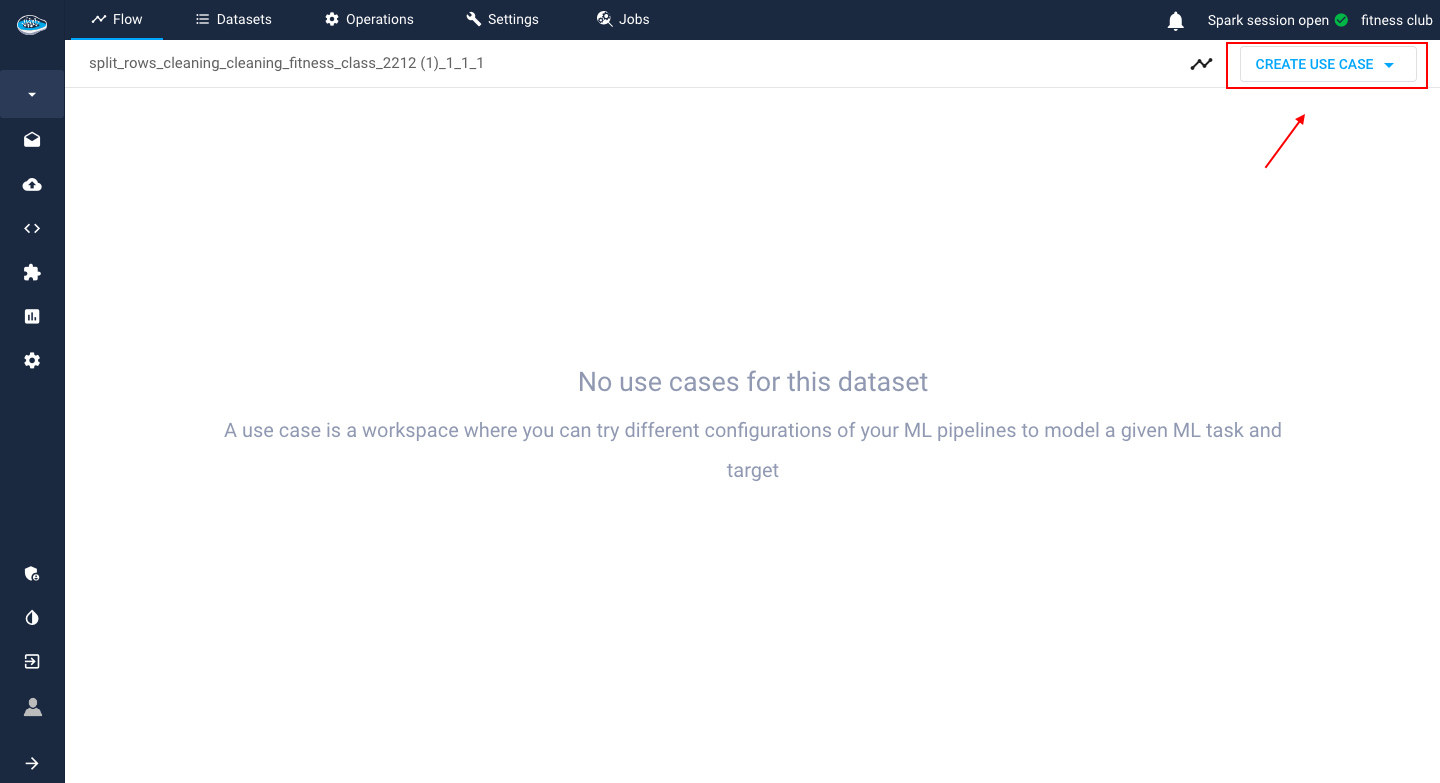
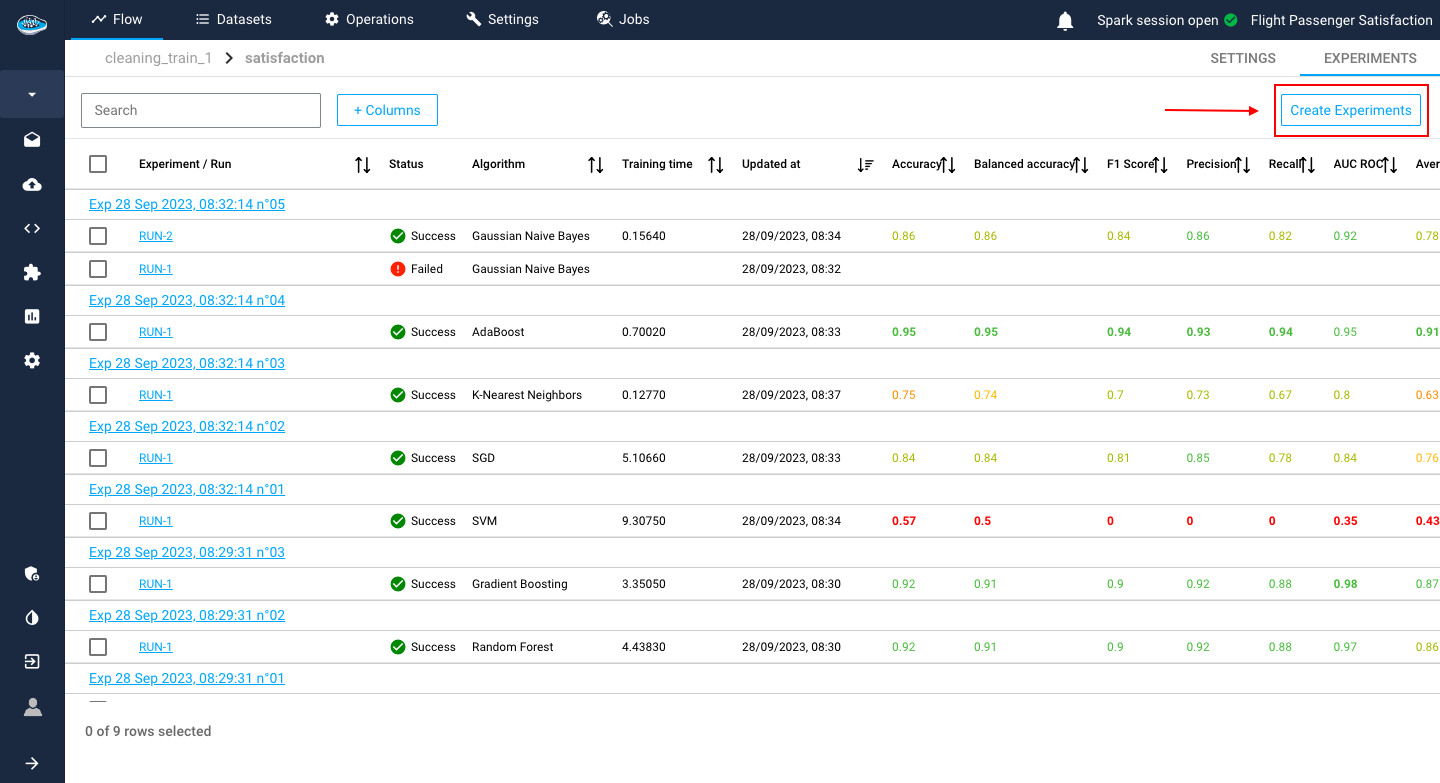
Creating the use case is the first step of the AutoML process and following that is the experimentation process. This is where you can create different experiments to test out some models and compare their performances to find the best one suited for your use case.
To figure out which model is the best choice for your needs, you have to choose what ML algorithms to use for the model training.
Hence having two options depending on your liking: either using built-in papAI ML algorithms or importing your trained external models.
Through papAI's built-in models
Our AutoML module has an abundance of useful features to create your first model such as what we will be focusing on here: built-in ML models.
Feature Selection
Before going into the models, you have to choose the features to be included in your different models. In this interface, you have a summary of the distribution of the feature types in your dataset with the column and row count. On the bottom panel, there is a list of all the features with some characteristics such as the type and meaning of the feature.
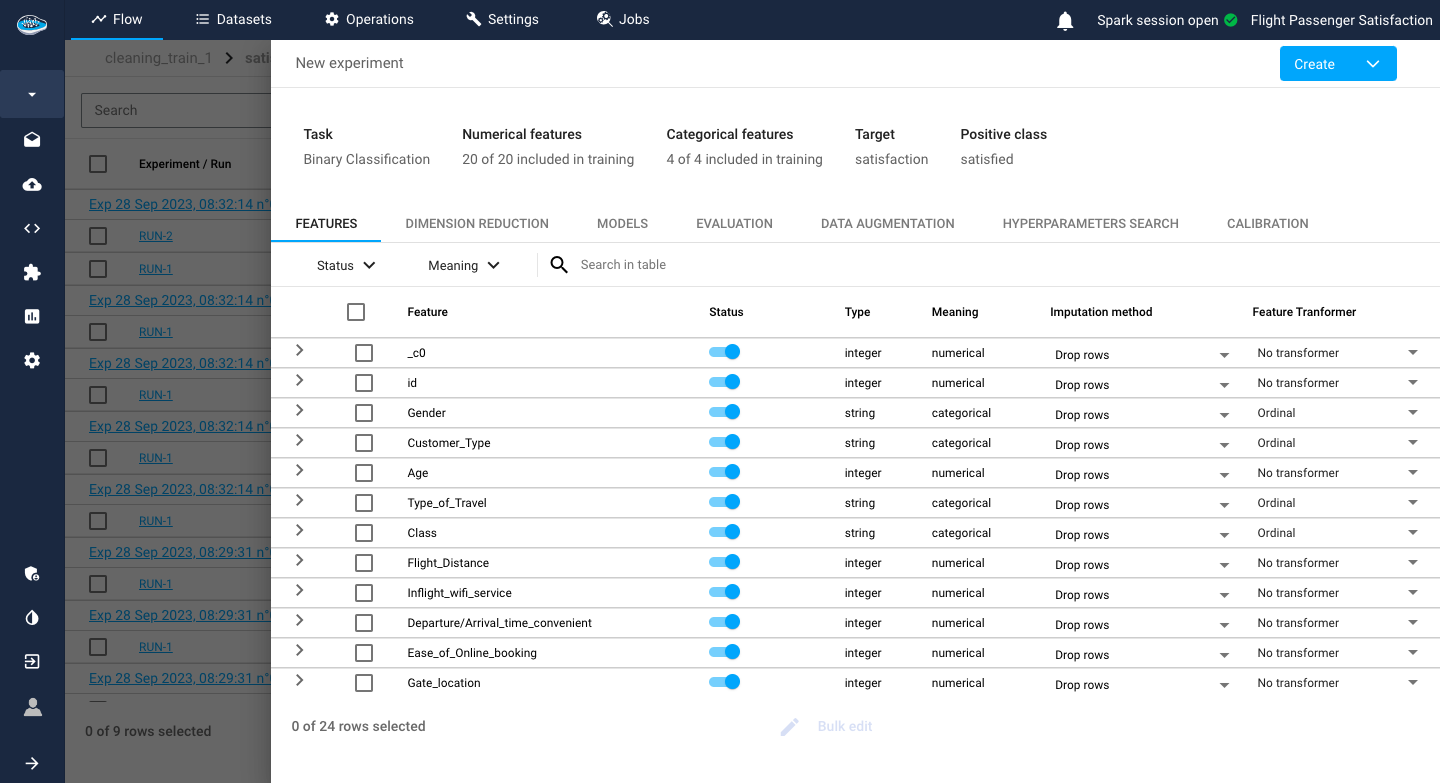
Adding to that, you have to set up some preprocessing steps, located on the last two columns of the features table, to add to your ML pipeline:
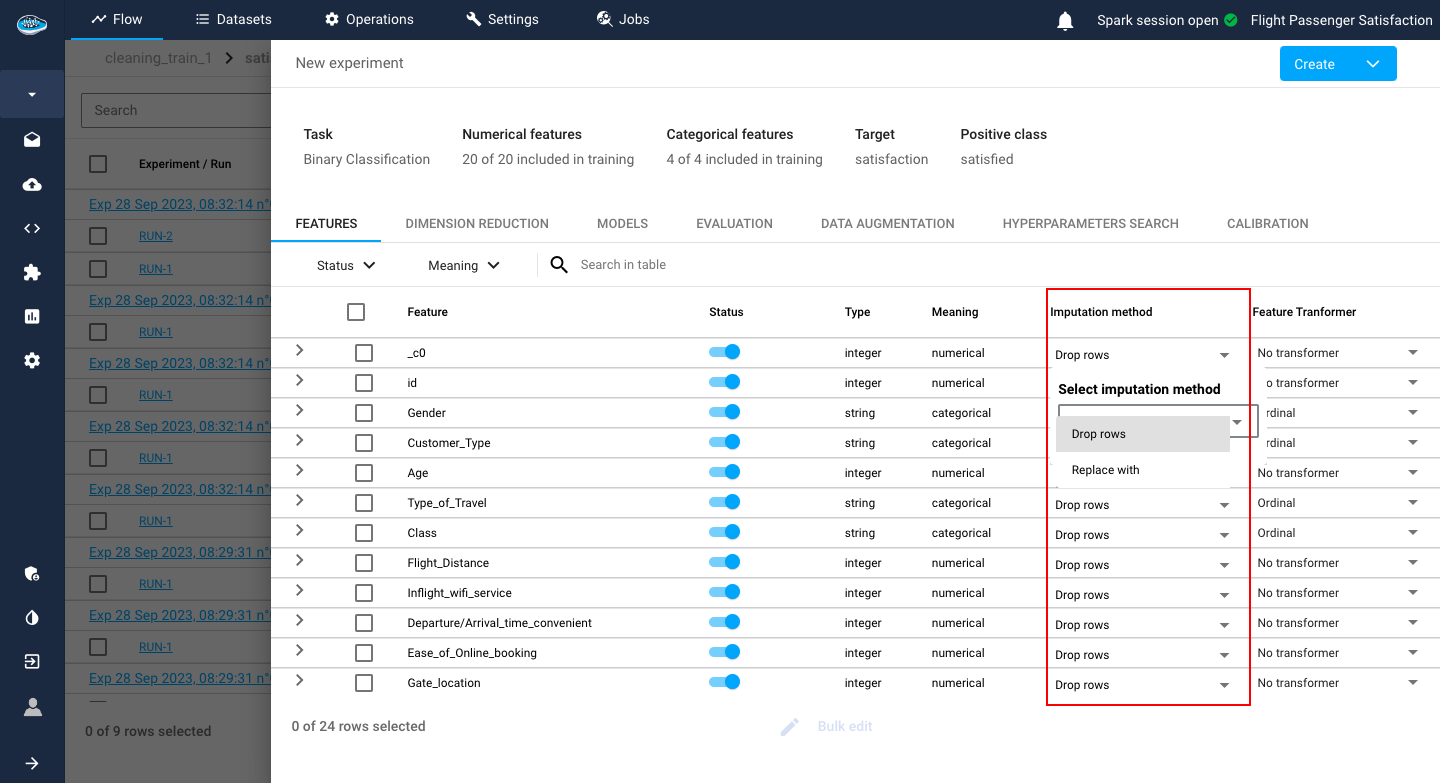
- The Imputation method option gives you the choice of either dropping the row or replacing it with a computed value if the platform detects any missing value.
By default, the dropping row option is selected.
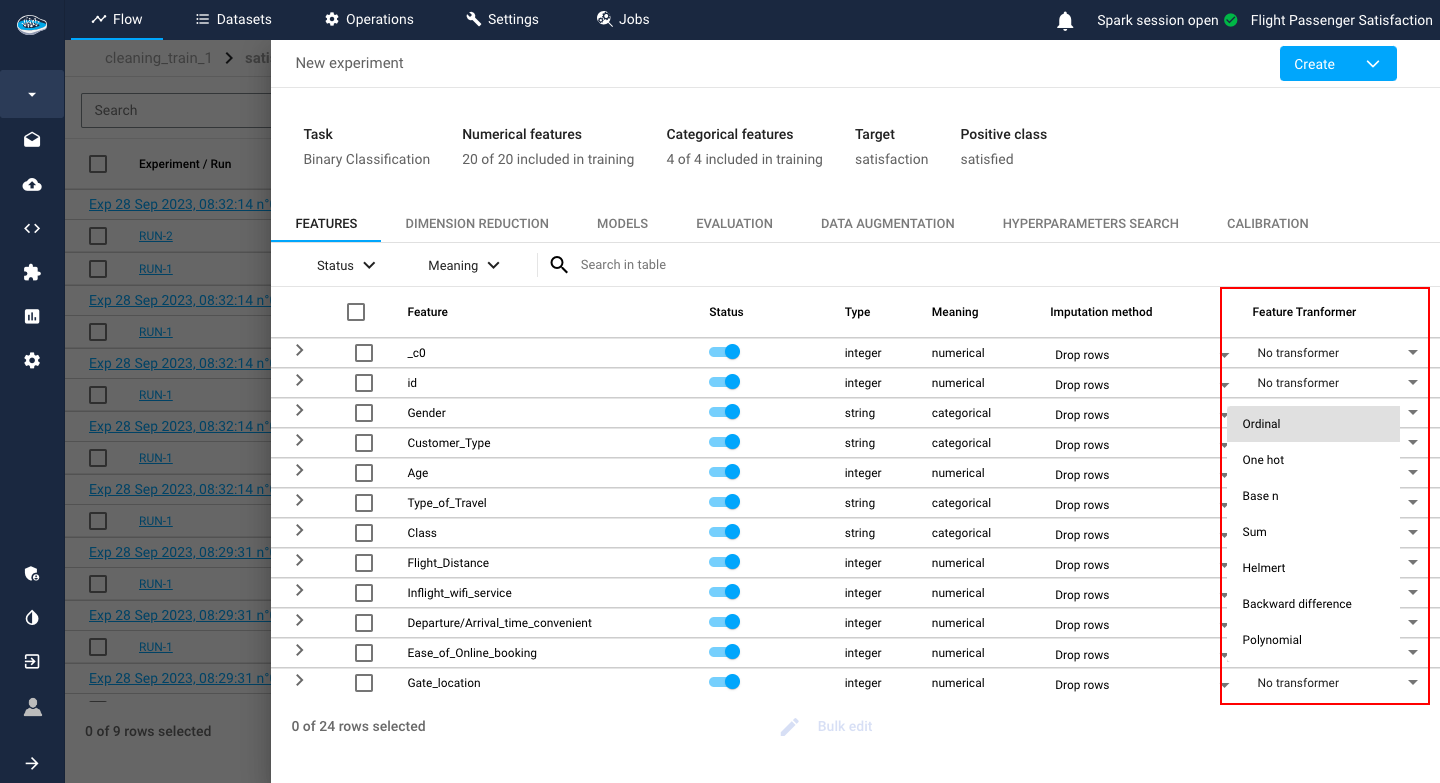
- The Transformer type option is important since it can help the model better understand each input from each feature. Depending on the feature meaning type (numerical or categorical), you can choose different types of transformers which are listed here.
Info
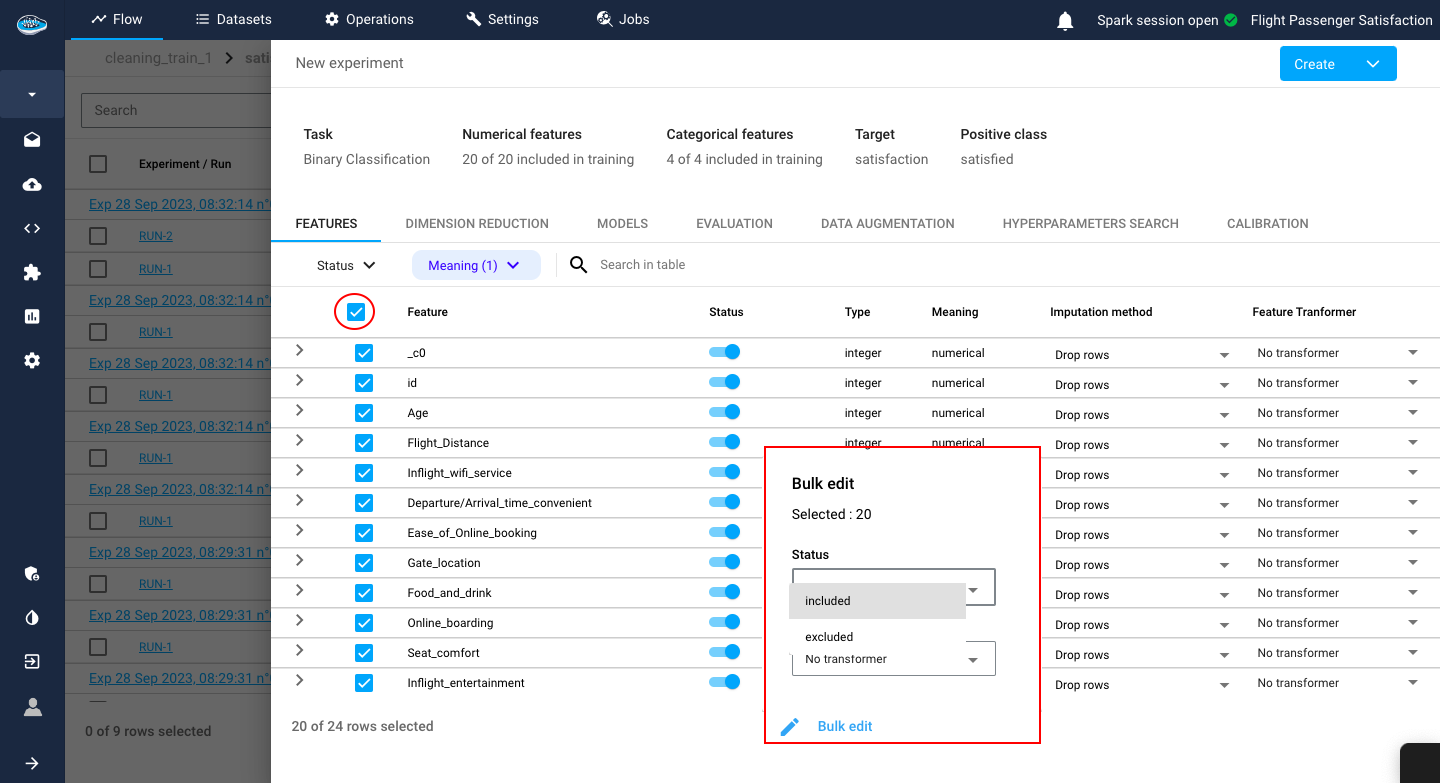
You can select directly all the features with the toggle button on the top left corner of the table. When in bulk mode, you can select the Features to be included or excluded from the model and also the Imputation method and Transformer to apply to the selected features.
Tip
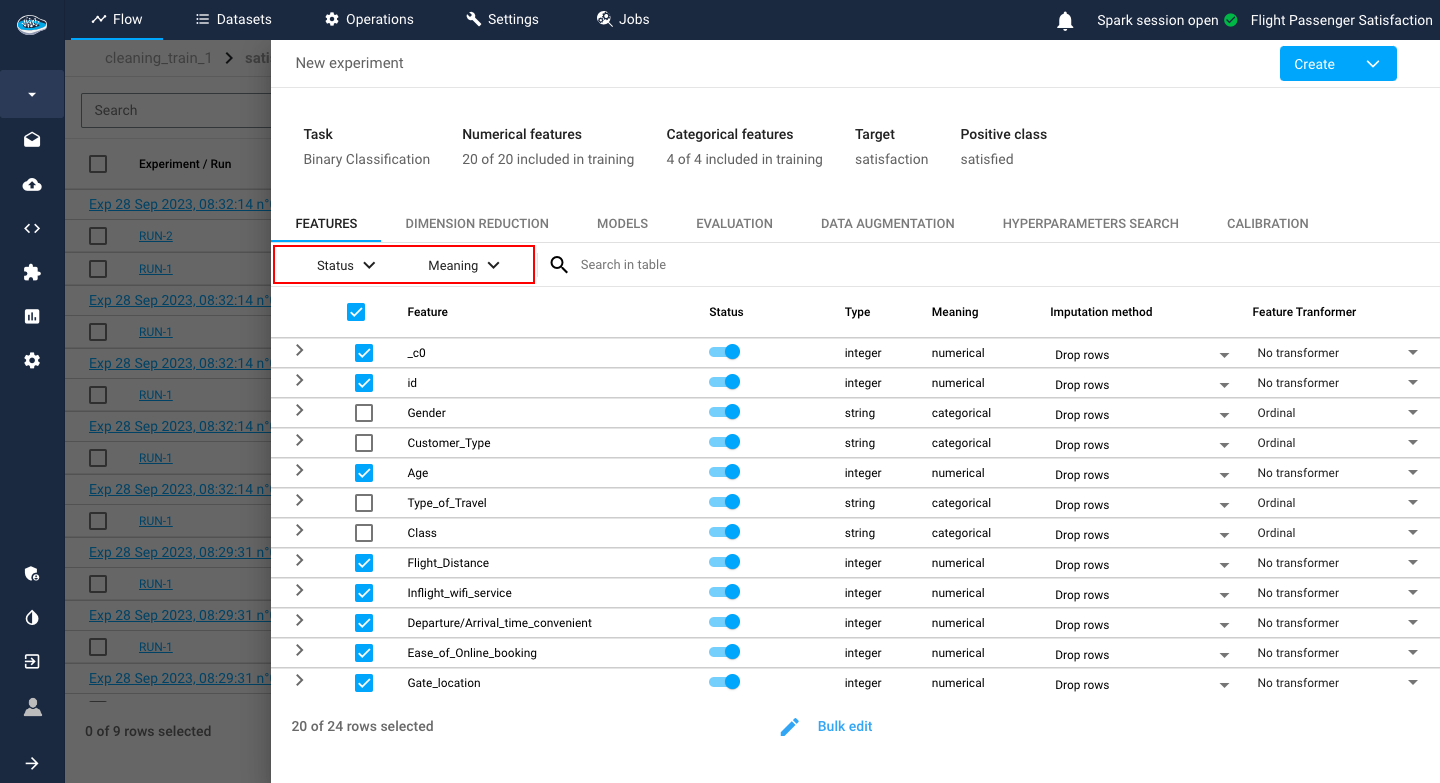
You can filter out the features you want through the filter search bar according to the name, meaning, imputation method or the transformer selected.
Example
You can select all the numerical columns by simply searching features with numerical meaning and the table will automatically display all the features that respect these criteria.
Tip
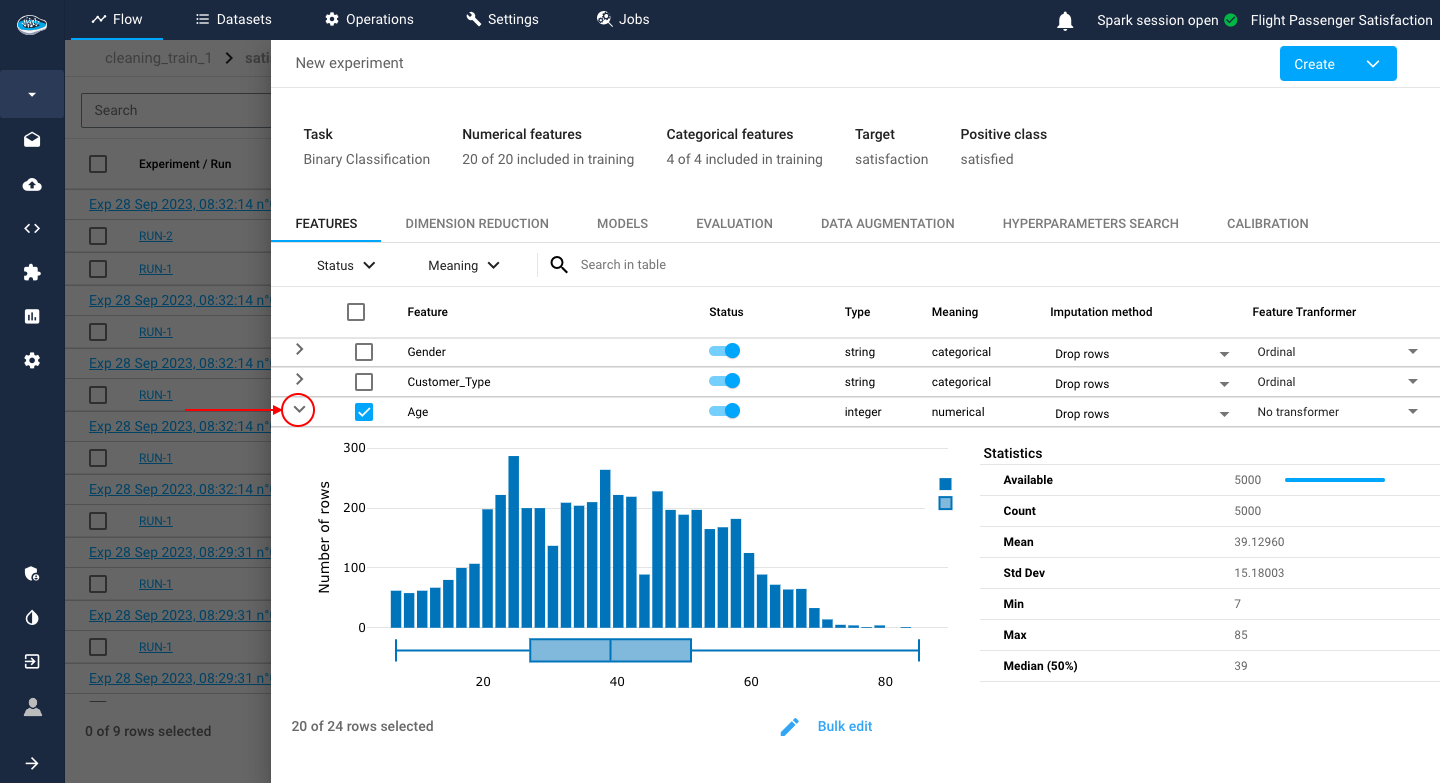
You can look up the data distribution of each feature and their statistics with the arrow located next to the feature's name to expand the bar graph.
Dimension Reduction
After selecting features and their transformation, you may want to reduce the dimension of the resulting dataset. In that case, two options are proposed here: either Feature Selection or PCA.
Through Feature Selection, the user has the option to remove:
- Features that contain a certain percentage of missing data
- Features that may contain only one single value
- Collinear features with a specific threshold for correlation value between two features
- Features with zero importance
- Features that have less importance than a certain threshold

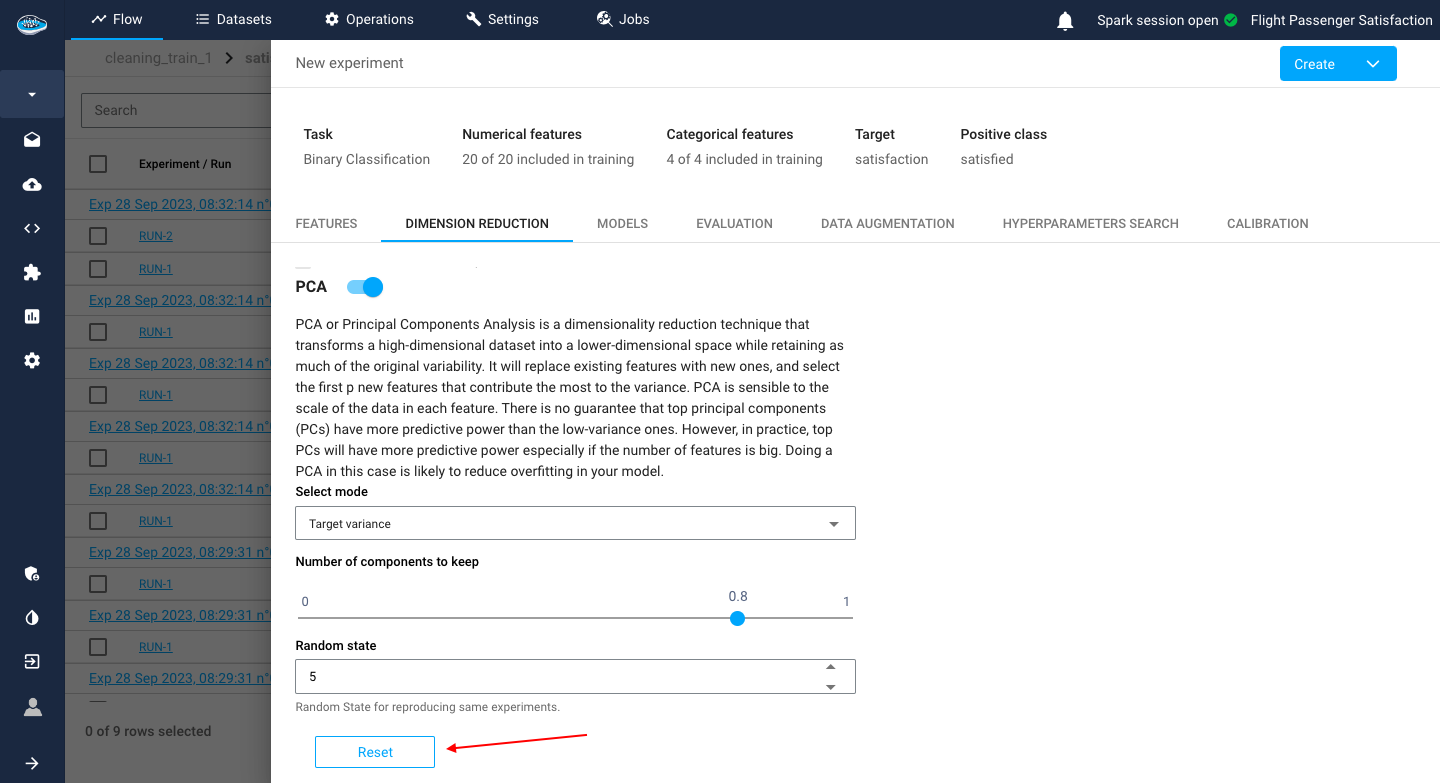
Through PCA (Principal Component Analysis), you need to indicate:
- the number of components to keep
- The variance threshold for keeping the components
- a random state value for reproducing the same experiment on the dataset whenever the PCA is run again.
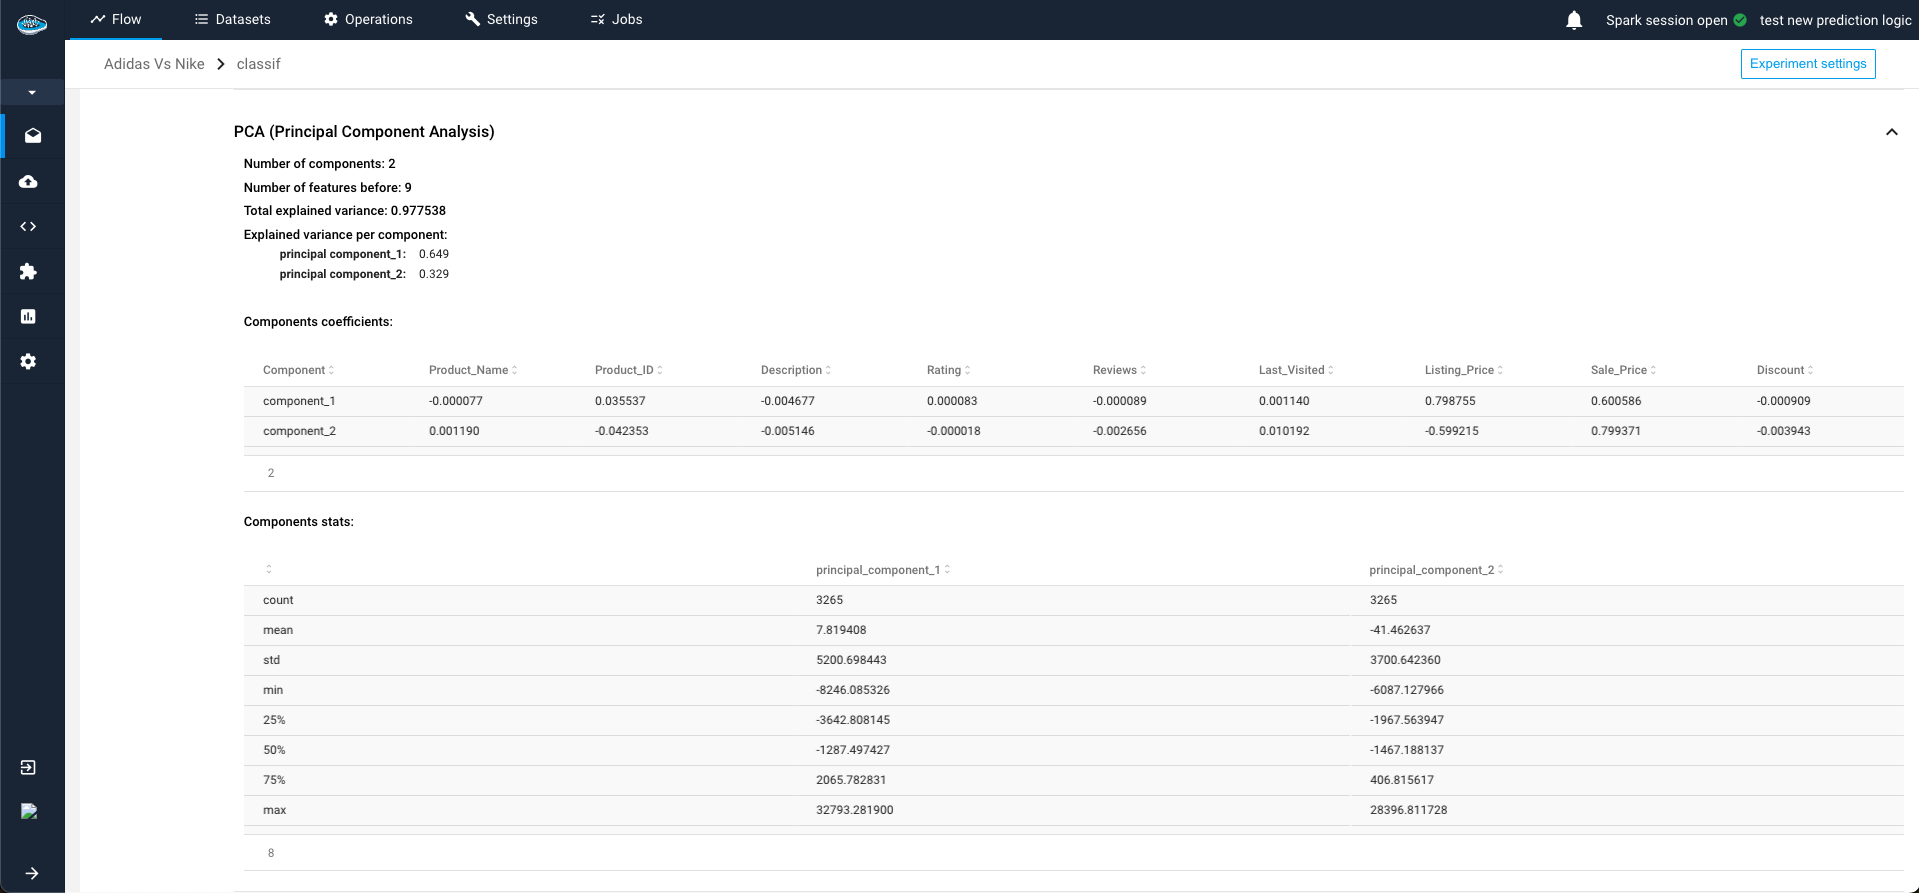
Info
When applying PCA, you can examine the composition of each component vector and its corresponding variance. This allows you to gain a deeper understanding of the process and how each component contributes to the overall model.
Tip
You can delete your modifications on this section or any other section by clicking on the red Reset button.
Model Selection
Following the dimension reduction section, you should choose what models will be tested. Depending on the type of ML task you chose when setting up your new use case, there will be specific algorithms according to it.
The different available models in papAI are the following...
- Logistic Regression
- SVM
- SGD
- Decision Tree
- Random Forest
- KNN
- Gradient Boosting
- Multi-Layer Perceptron
- Adaboost
- Gaussian Naive Bayes
- Deep Learning
- Linear Regression
- SVM
- SGD
- Decision Tree
- Random Forest
- Gradient Boosting
- KNN
- Multi-Layer Perceptron
- LARS Regression
- OMP Regression
- Polynomial Regression
- Adaboost
- Mean Shift
- Spectral
- Agglomerative
- DBSCAN
- OPTICS
- K-Means
- Affinity Propagation
- BIRCH
- Cox Proportional Hazards
- Weibull AFT
- Log-Normal AFT
- Log-Logistic AFT
- SARIMAX
- Block RNN
- FFT
- LightGBM
- NBEATS
- Prophet
- SES
- TCN
- Regular ML models
- Deep AR
For every single model, you have a variety of parameters you can tweak to obtain a well-prepared model.
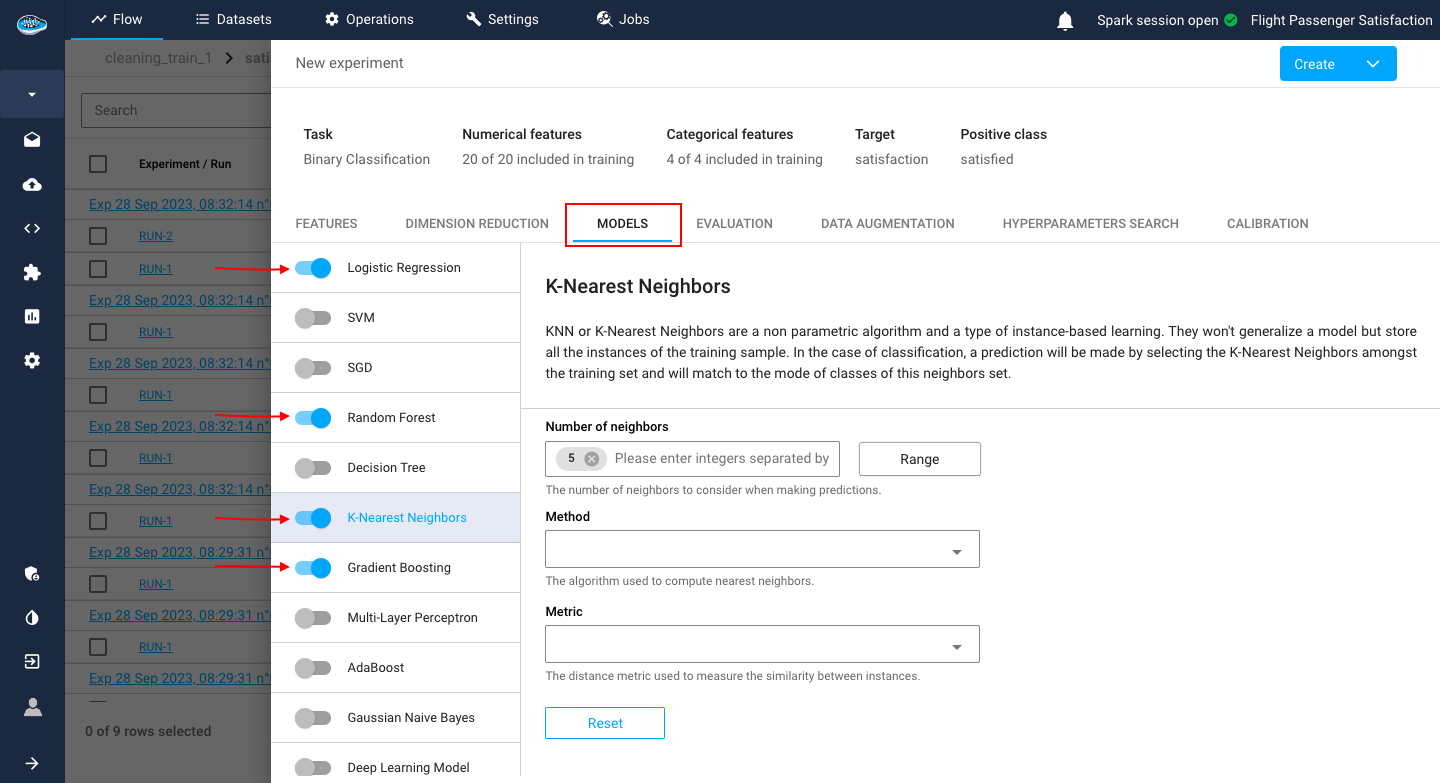
Example
For this example, we have a use case of Binary Classification where we selected multiple models including KNN where you can tune up its specific settings.
Tip
Instead of creating each experiment with the same model but with different parameters, you have the option of adding multiple values into some model parameters and the platform will single out the best model with its best settings according to the resulting metrics from their training. This feature is called the Hyperparameters Search.
Evaluation
After the model selection and configuration, you need to select how the model evaluation will be computed through the Data Splitting method. On this tab, you can select :
K-Fold method: It's a splitting method consisting of several groups you specify, used for the evaluation
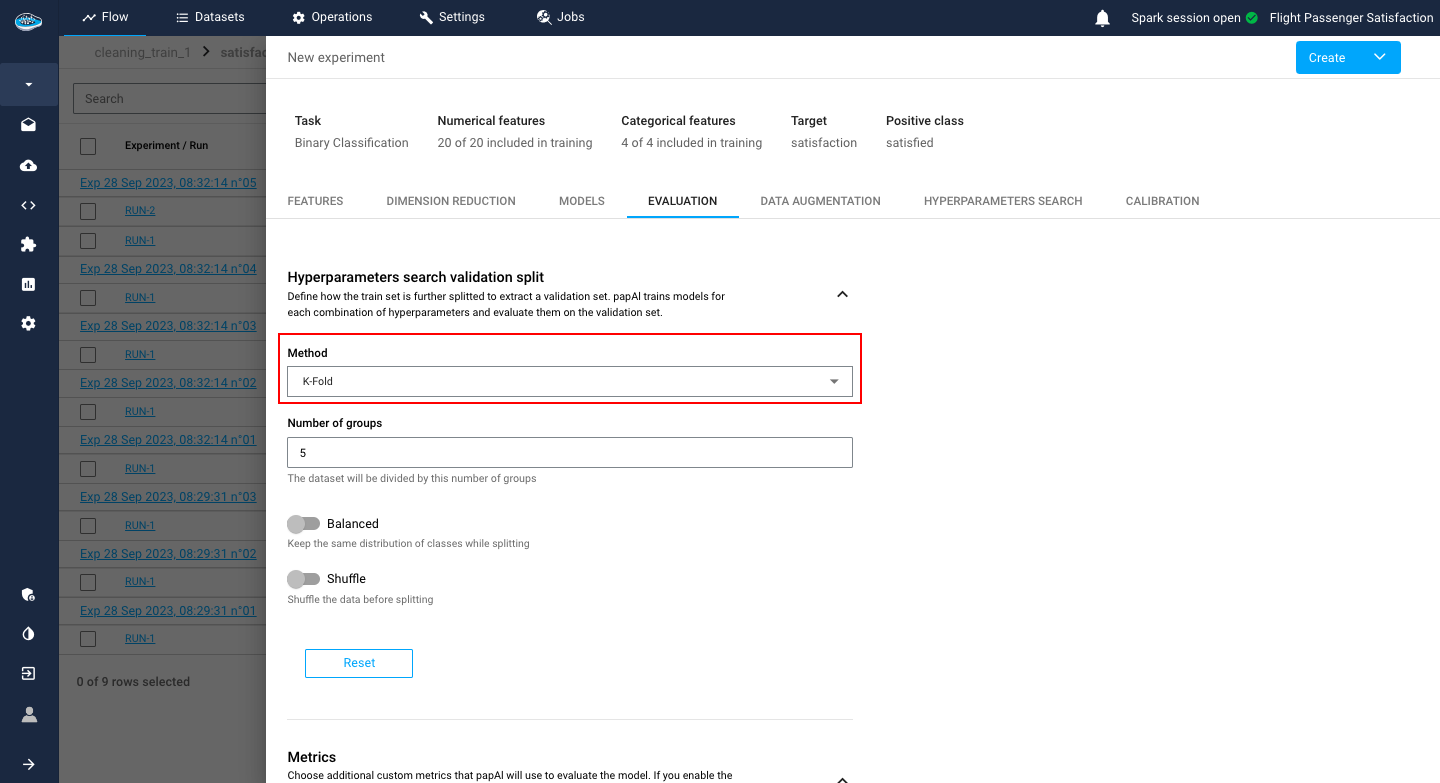
Shuffle and Split: It's a regular splitting method where you specify the Validation set ratio between 0 and 1.
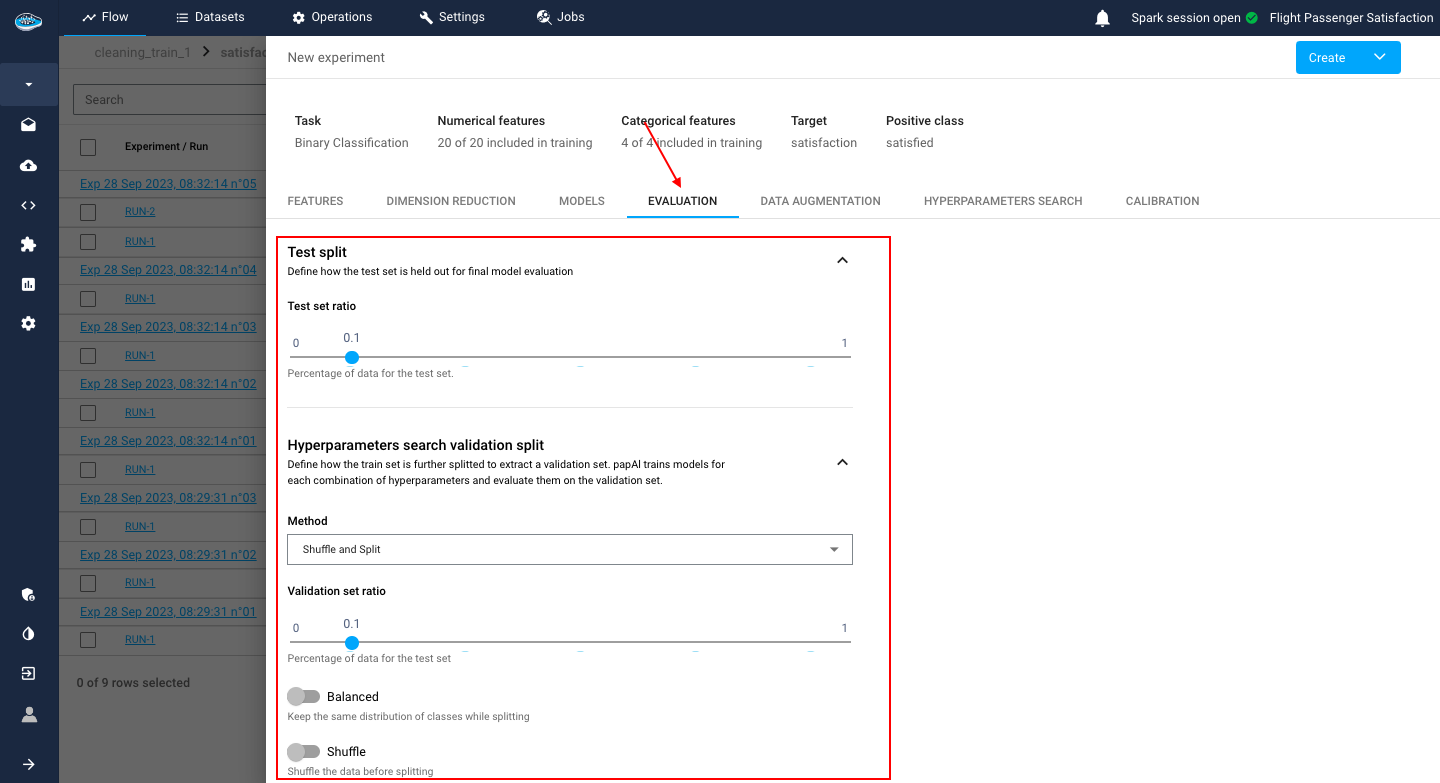
Tip
You can activate or deactivate two options: the Balanced option for balancing the class ratio and the shuffle option to shuffle your data before splitting.
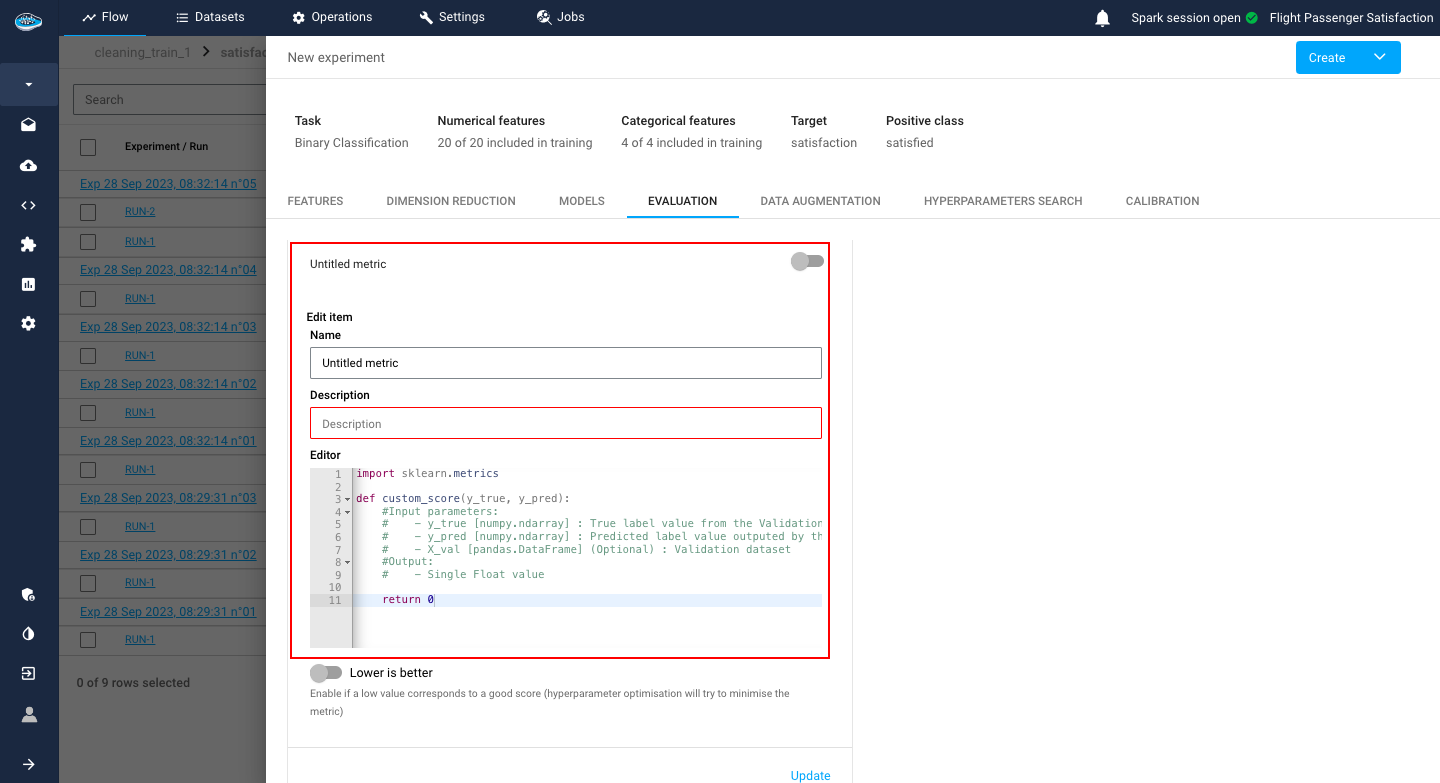
Including the splitting method, there is also an option to add a custom metric that you want to include in your model evaluation if the regular metrics are not enough for you.
These settings include the name, and the description of your metric but also a Python recipe editor, similar to the Python recipe operation, to calculate your metric and an indicator of whether the metric value is lower or higher means the better.
After finishing setting up your metric, you simply click on the submit button and it will be automatically added to your experiment.
Tip
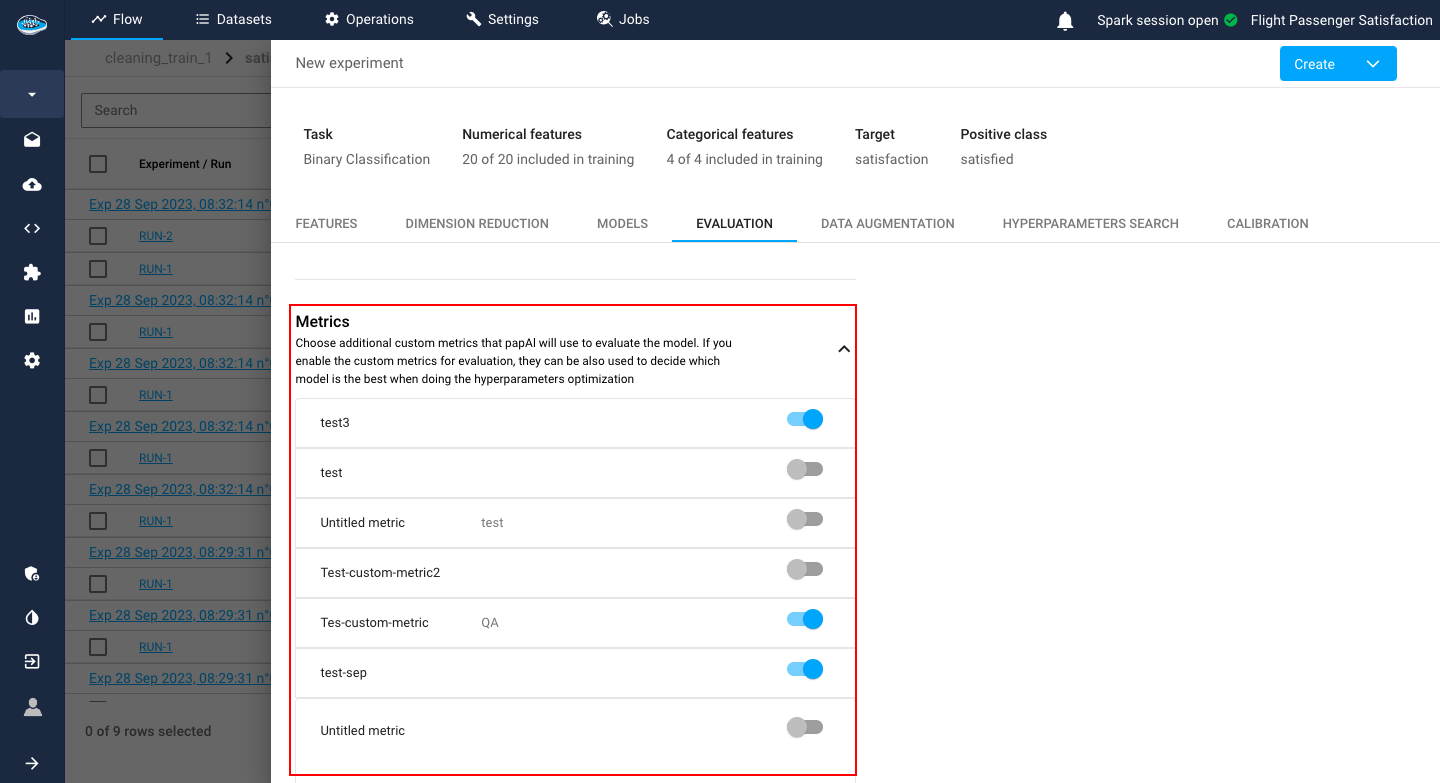
The custom metric can be used as a reference for your Hyperparameter Search metric.
Info
You can set up multiple custom metrics by simply clicking the Add button and submitting after setting it all up.
Data Augmentation
In some cases, your input is too small for training a model or you have imbalanced target class distribution that can influence the decision-making process of your soon-to-be model. That's where Data Augmentation is key for your experiment. This process helps you synthesize data rows and add them to your input in order to help expand the size of your dataset and also to balance out the target distribution thus reducing bias in your prediction.
papAI offers some Data Augmentation algorithms to help you solve these issues. You select one of the algorithms :
- Random over-sampling
- SMOTE
- SMOTENC
- ADASYN
- Borderline SMOTE
- SWIM Maha
- SWIM RBF
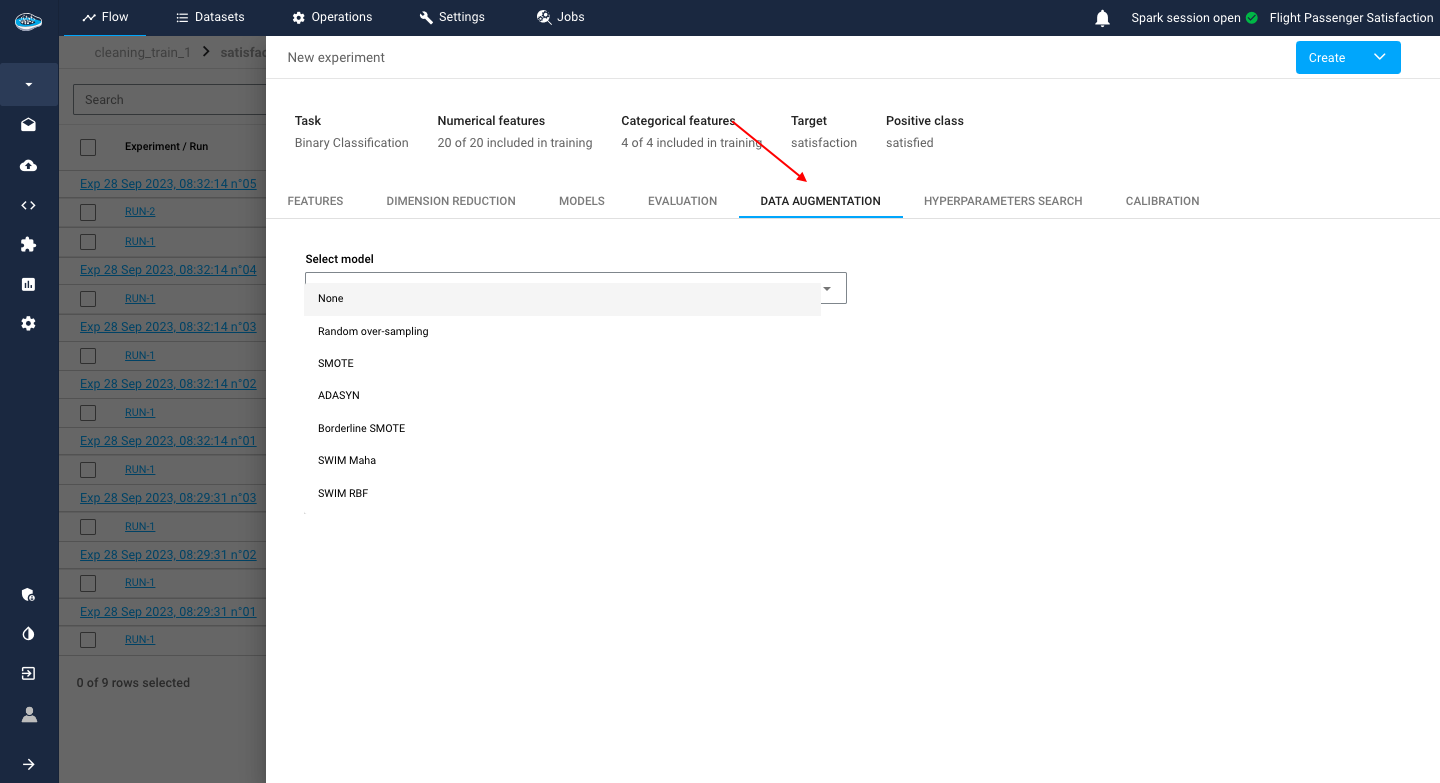
When selected, you tune up some settings and it will be applied in the preprocessing step when launching the experiment.
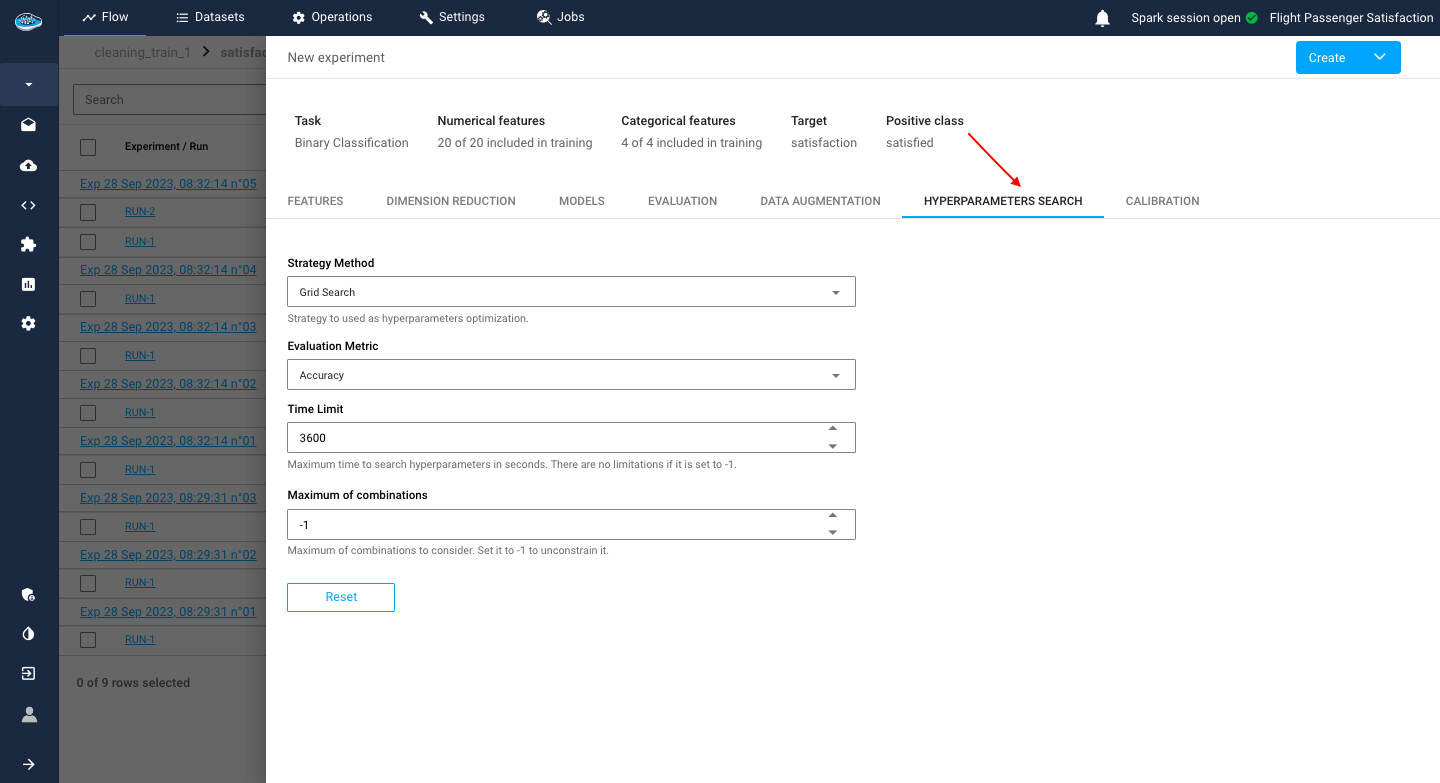
Hyperparameters Search
Sometimes, there is a need of enhancing your model research and test out all the possible combinations of hyperparameters for the same model to optimize its performance. In that case, in the experiment creation interface, the platform gives you the option to trigger this feature called Hyperparameters Search.
With this feature, you have the ability to select the method to be used and to set an evaluation metric that the search will be based. Adding to that, other settings can be tuned such as setting the search time limit or the number of maximum combinations since the search can be time-consuming with multiple calculations.
Warning
To include this feature on the ML pipeline and launch it, you need in the model settings, to add multiple values or options and the platform will detect it automatically.
Example
For a Random Forest model, you can select 100, 200 and 500 trees with Gini or Entropy estimator to try and find the best model with one of these options.
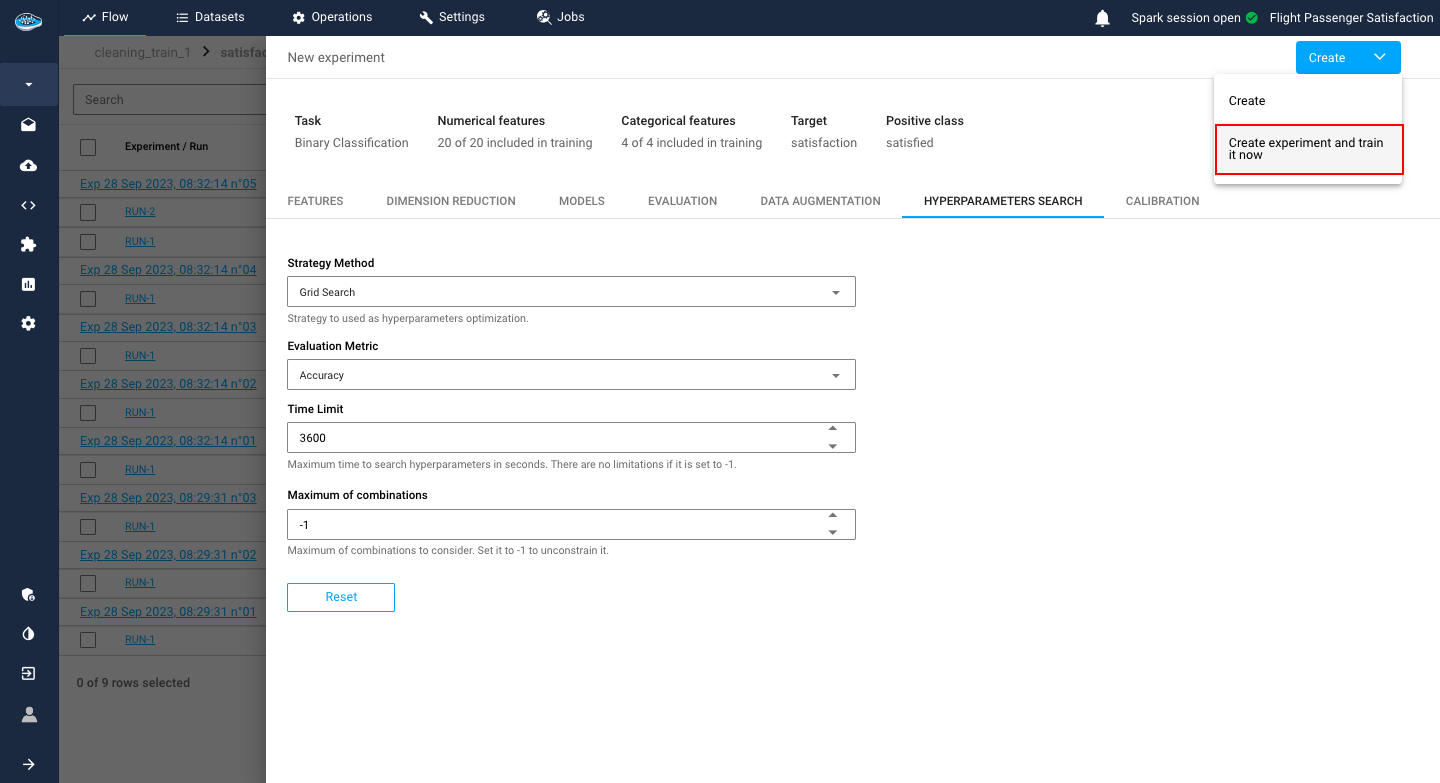
When finished going through all the settings, you just click on the green Train button to launch the training process and your experiment will appear on the experiment list of your use case.
Through imported external models
One of the main objectives using papAI is the fact of integrating external models while having the same user experience as when creating a new experiment within the platform.
In the use case interface, select the import pipeline button, located next to the Create use case button.
A window pops up, the same one as in the use case creation with nearly the same steps : first the ML task selection and the target selection. The only difference is the two last steps with the table panel used for the selection of the features included in the model and the last step being the model import from your local machine where you can import your external model to include into your papAI's use case.
Warning
The file format accepted by papAI for an external model is only the JOBLIB format.
Finally, when all the steps are completed, you click the Add button to add it to your already existing experiment list.