Create a model registry and predict the output
After conducting extensive testing on various machine learning models and combinations, and evaluating their performance, you may have identified one or multiple models that are particularly suitable for your use case. Once you have found these models, you may want to test them further on another raw dataset by calculating predictions on it. In this regard, papAI offers an excellent solution that enables you to promote your preferred models and utilize them to make predictions on any other dataset, allowing you to evaluate their ability to predict the correct value.
Selecting the right model is crucial during the prediction step to ensure that you can successfully solve your use case. The predictive ability of your selected model is an essential factor that determines the accuracy of your predictions. Therefore, you must choose the most appropriate model that performs optimally on your specific use case. With papAI, you have the flexibility to choose and promote the best-performing model, ensuring that you can produce accurate and reliable predictions for any given dataset.
Add an experiment into a model registry
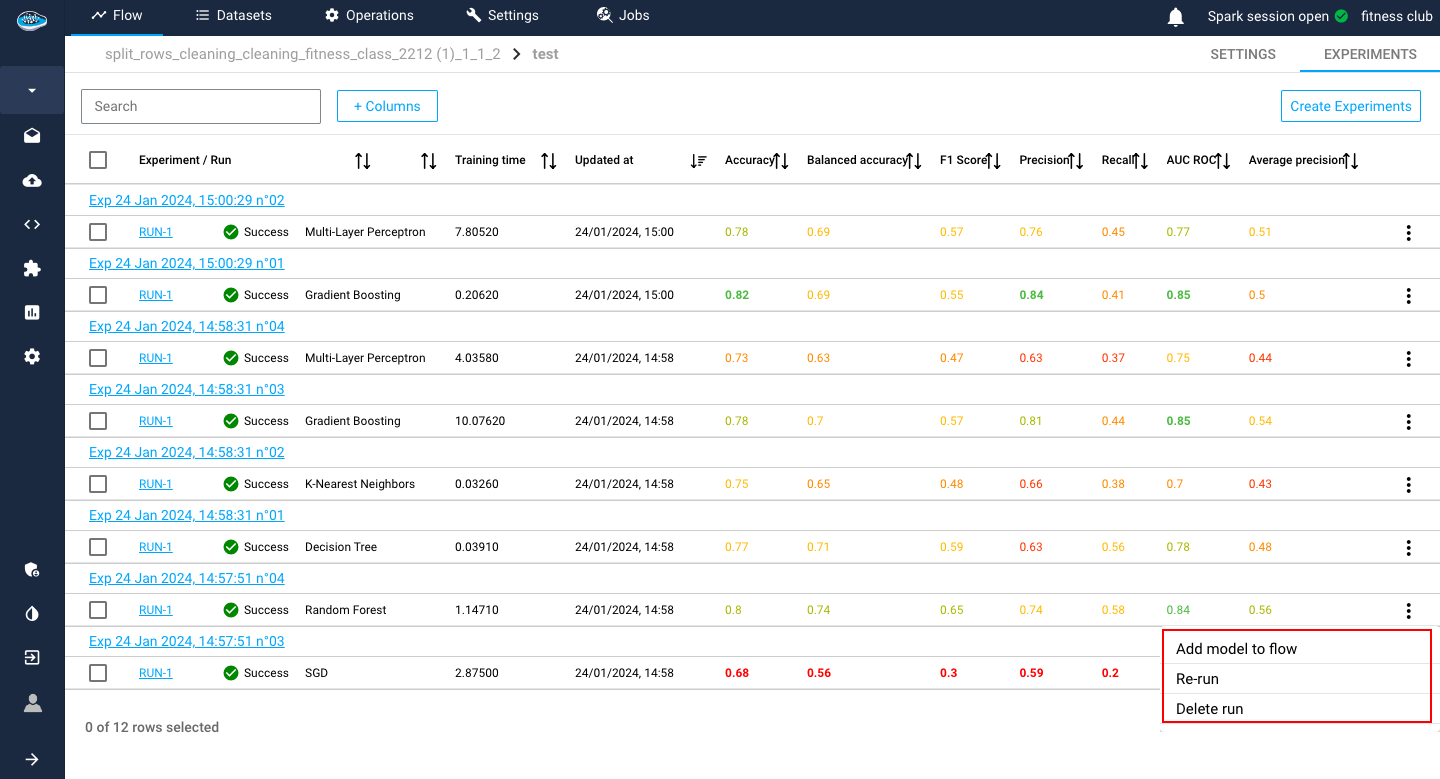
Before going into the prediction step, you need to first add your desired model that you want apply its prediction in a model registry. This step is quite simple since you need to be on the AutoML module interface, specifically on the experiments list of your use case. In this list, you select which / experiment you want to promote by either clicking the icon and the far right of the row or by ticking the box next to the run and select the Add Model to Flow action in the Actions list.
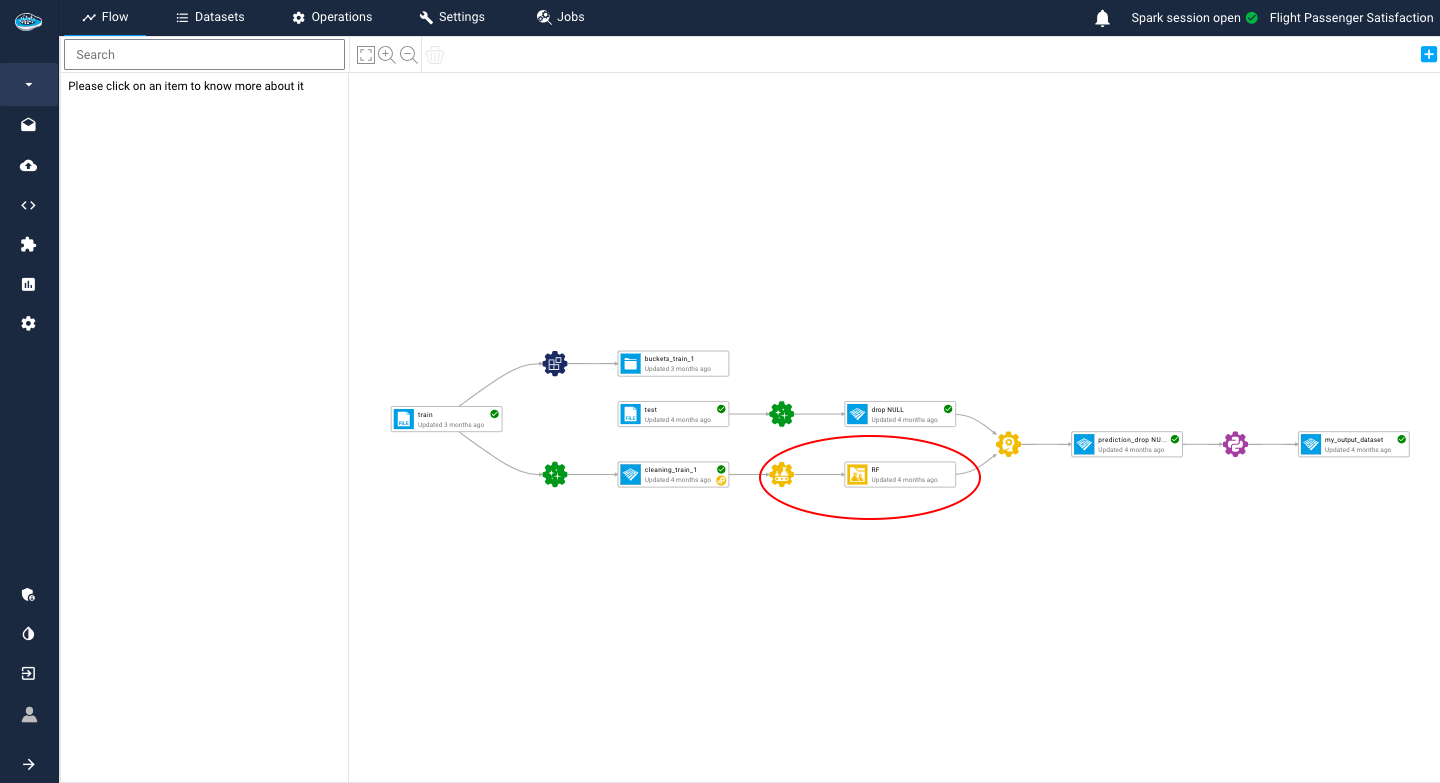
When you initiate the process of adding a new model into a registry, a new window will appear, presenting you with various settings that you can fine-tune to optimize the performance of your model. One of the first settings that you will encounter is whether you want to add the model to a new model registry or an existing one. In case you decide to create a new registry, you will need to select the training set and fill in some critical fields such as the name of the recipe and the registry. Once you have completed all the necessary information, you can click on the Submit button to apply the changes and display the new registry in your project's flow.

Once you have set up your model registry and fine-tuned all the necessary settings, you will be able to use your model for prediction, and you can be confident in its ability to deliver accurate and reliable results.
Warning
You can only add a successful run into a model registry else you will need to either re-run your experiment or modify its settings to have a working model.
Prediction
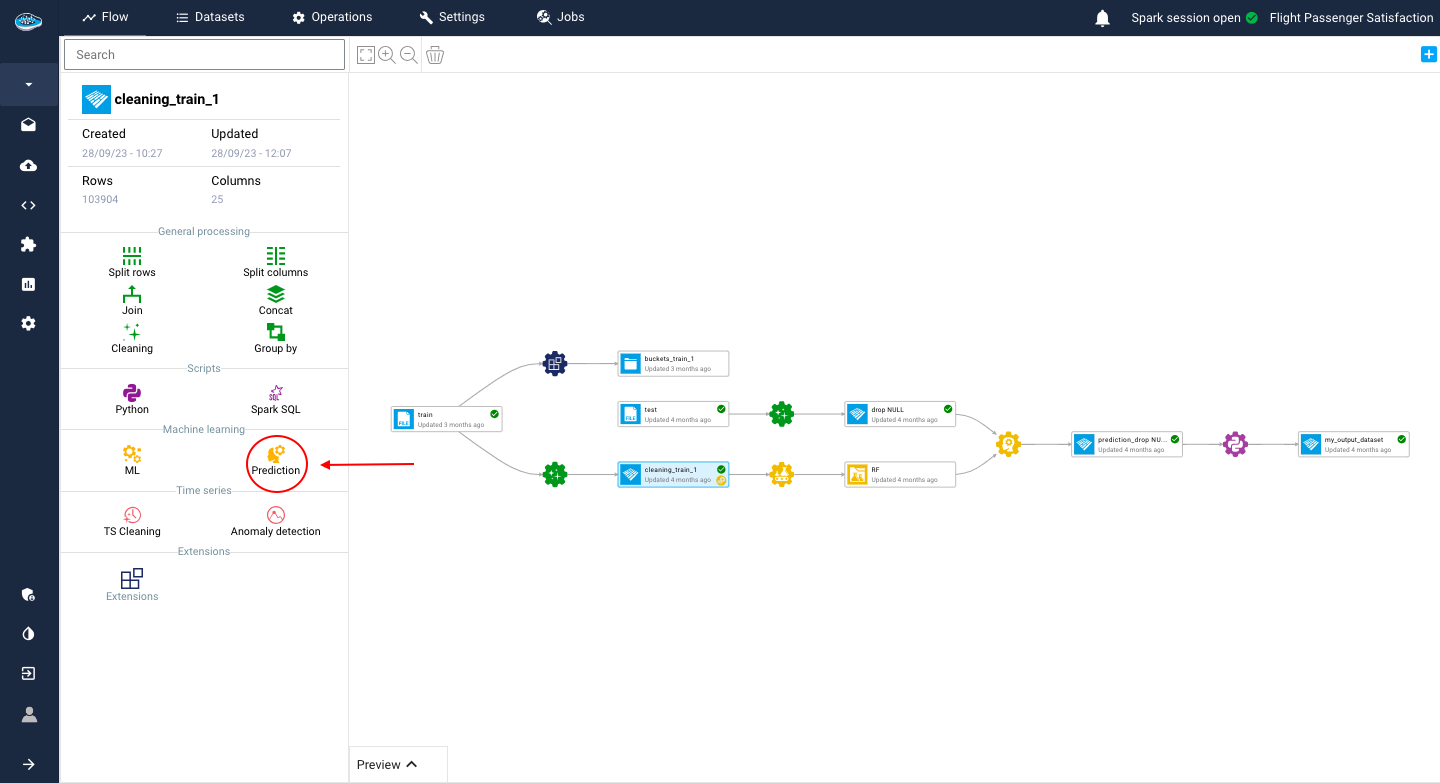
After you have identified and promoted the right machine learning model to use, the next step is to generate predictions on a specific dataset included in your project's flow. To achieve this, you can use the Prediction tool, which is readily available in your project's flow on the left sidebar. This tool is designed to be user-friendly and straightforward to use, enabling you to generate predictions with minimal effort.
The prediction tool is a powerful feature of papAI that allows you to quickly and easily generate predictions based on your machine learning models. By leveraging this tool, you can streamline your prediction process, save time, and improve the overall accuracy of your predictions.
To use the prediction tool, all you need to do is select the desired dataset from your project's flow and click on the prediction icon.
A small pop-up will appear, presenting the three steps needed to apply the operation on the chosen dataset. Here are the steps :
- The first step consists of choosing the use case where your promoted model is located
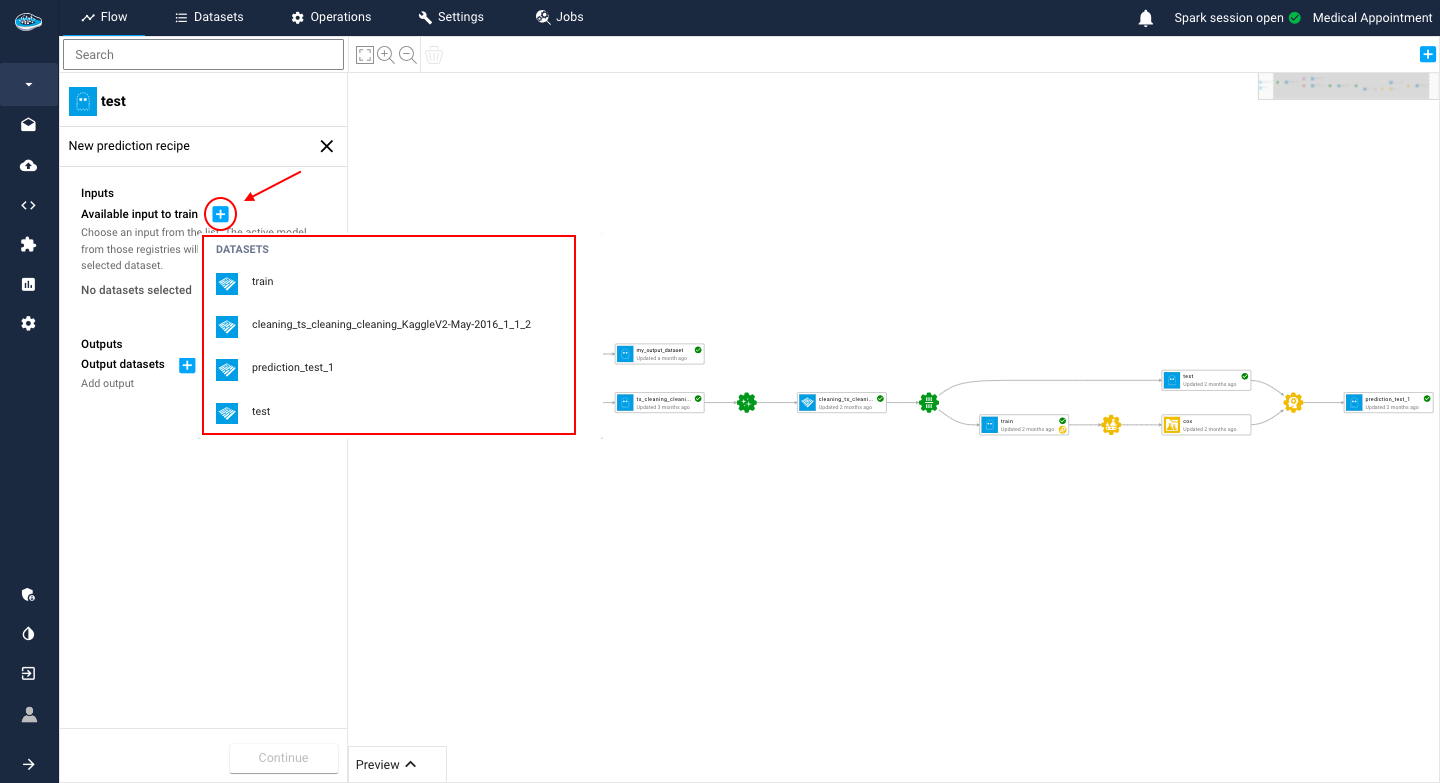
- The second one is choosing your preferred model registry that you promoted from your use case
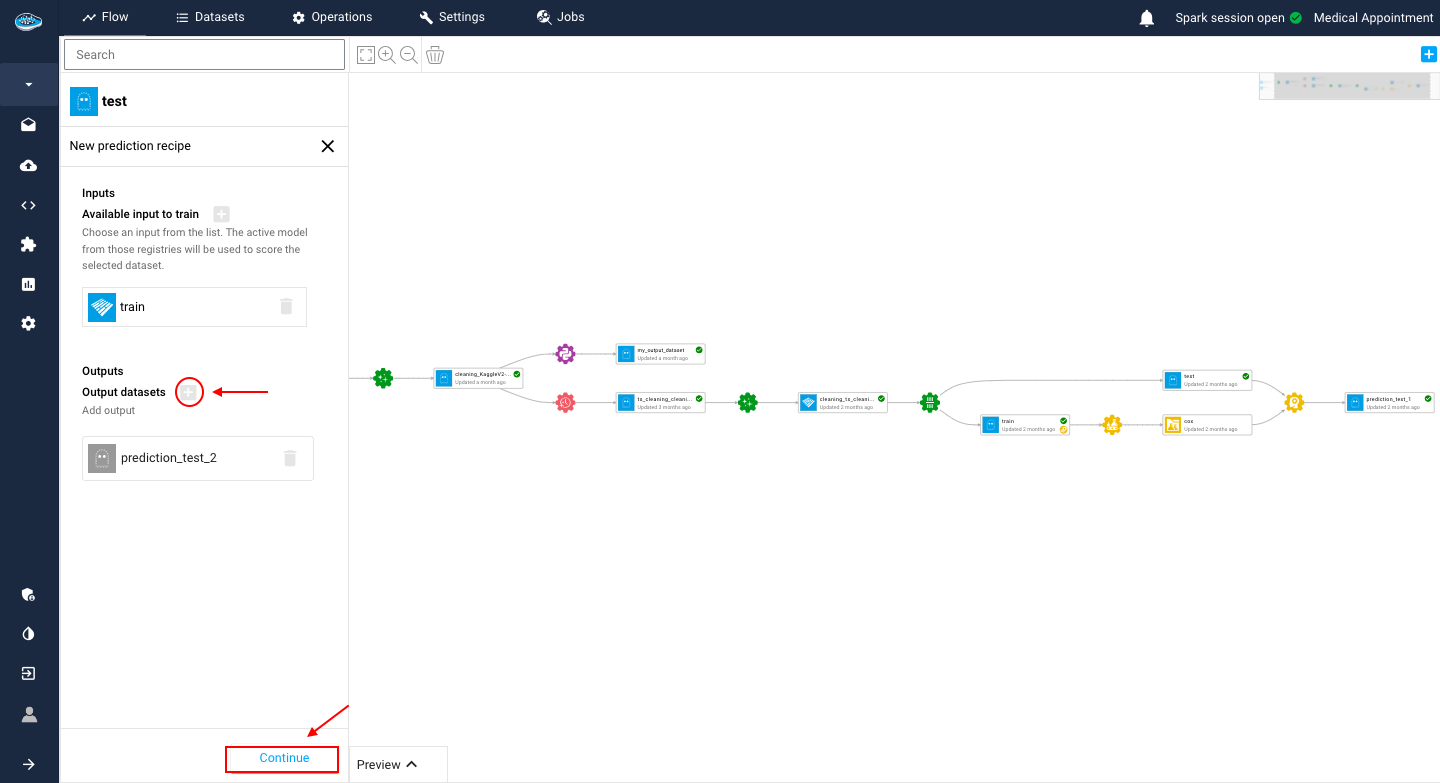
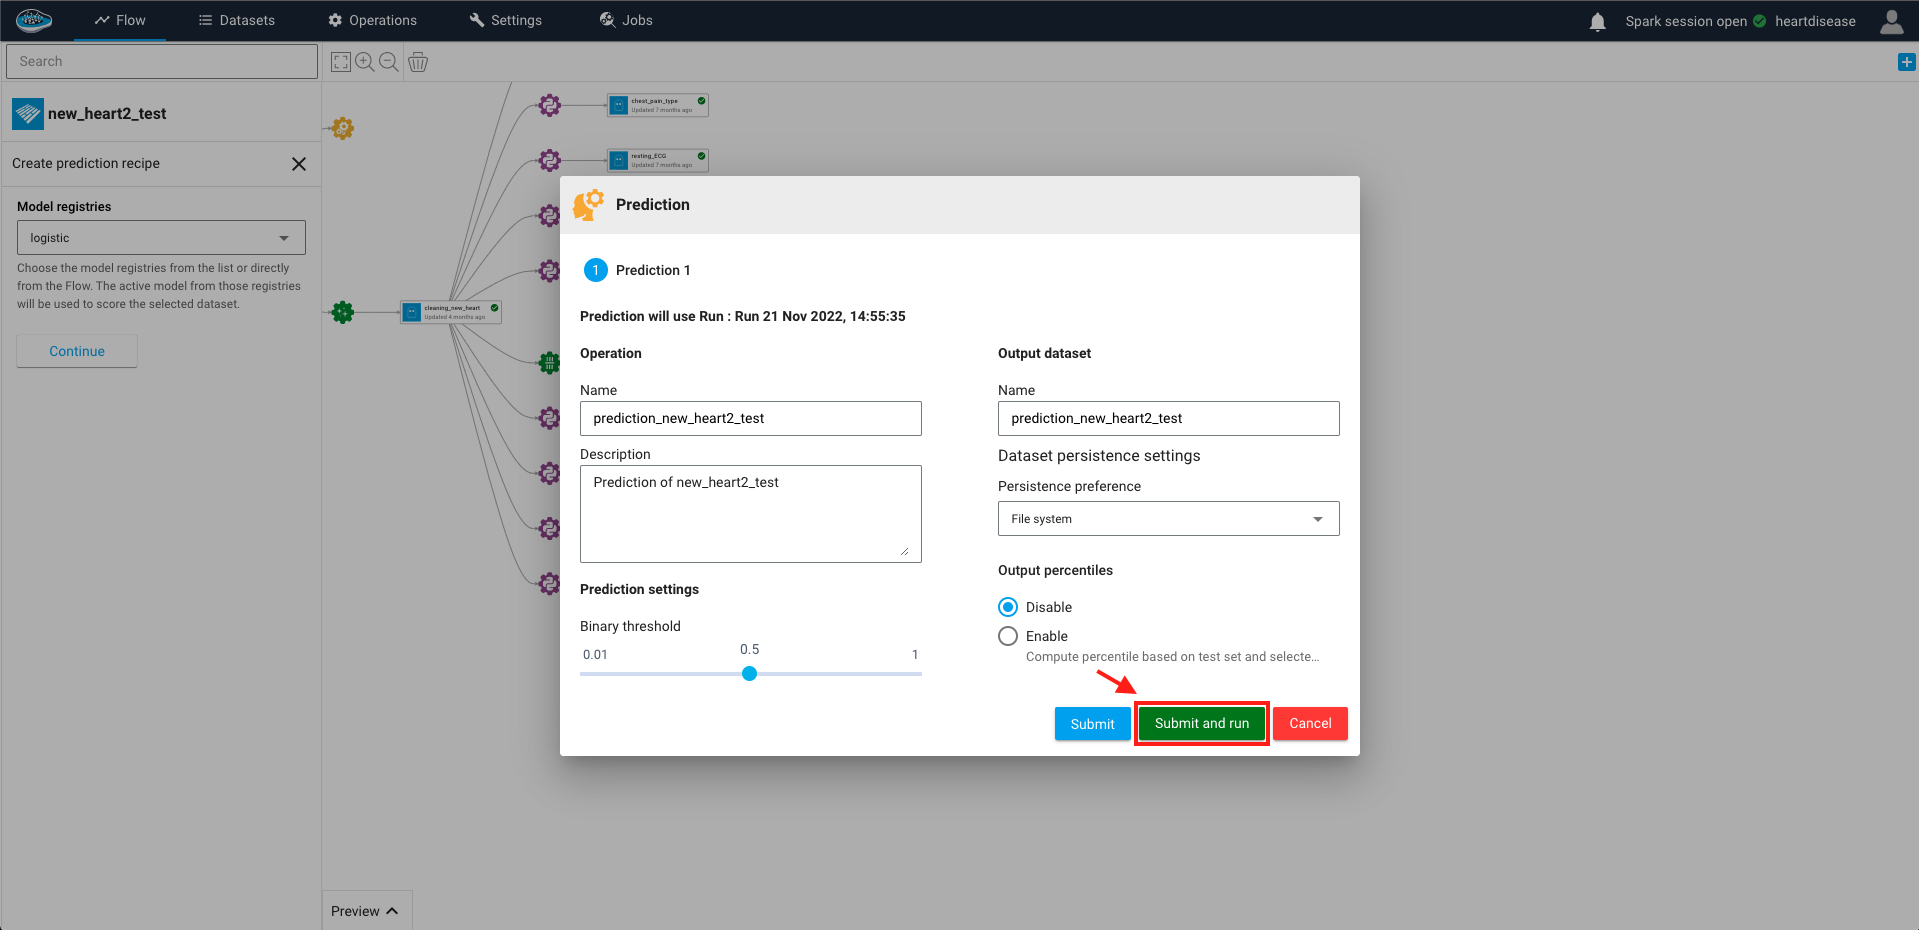
- The final step is tune up some settings related to the operation such as the name of the output dataset or the selected threshold for the target prediction.
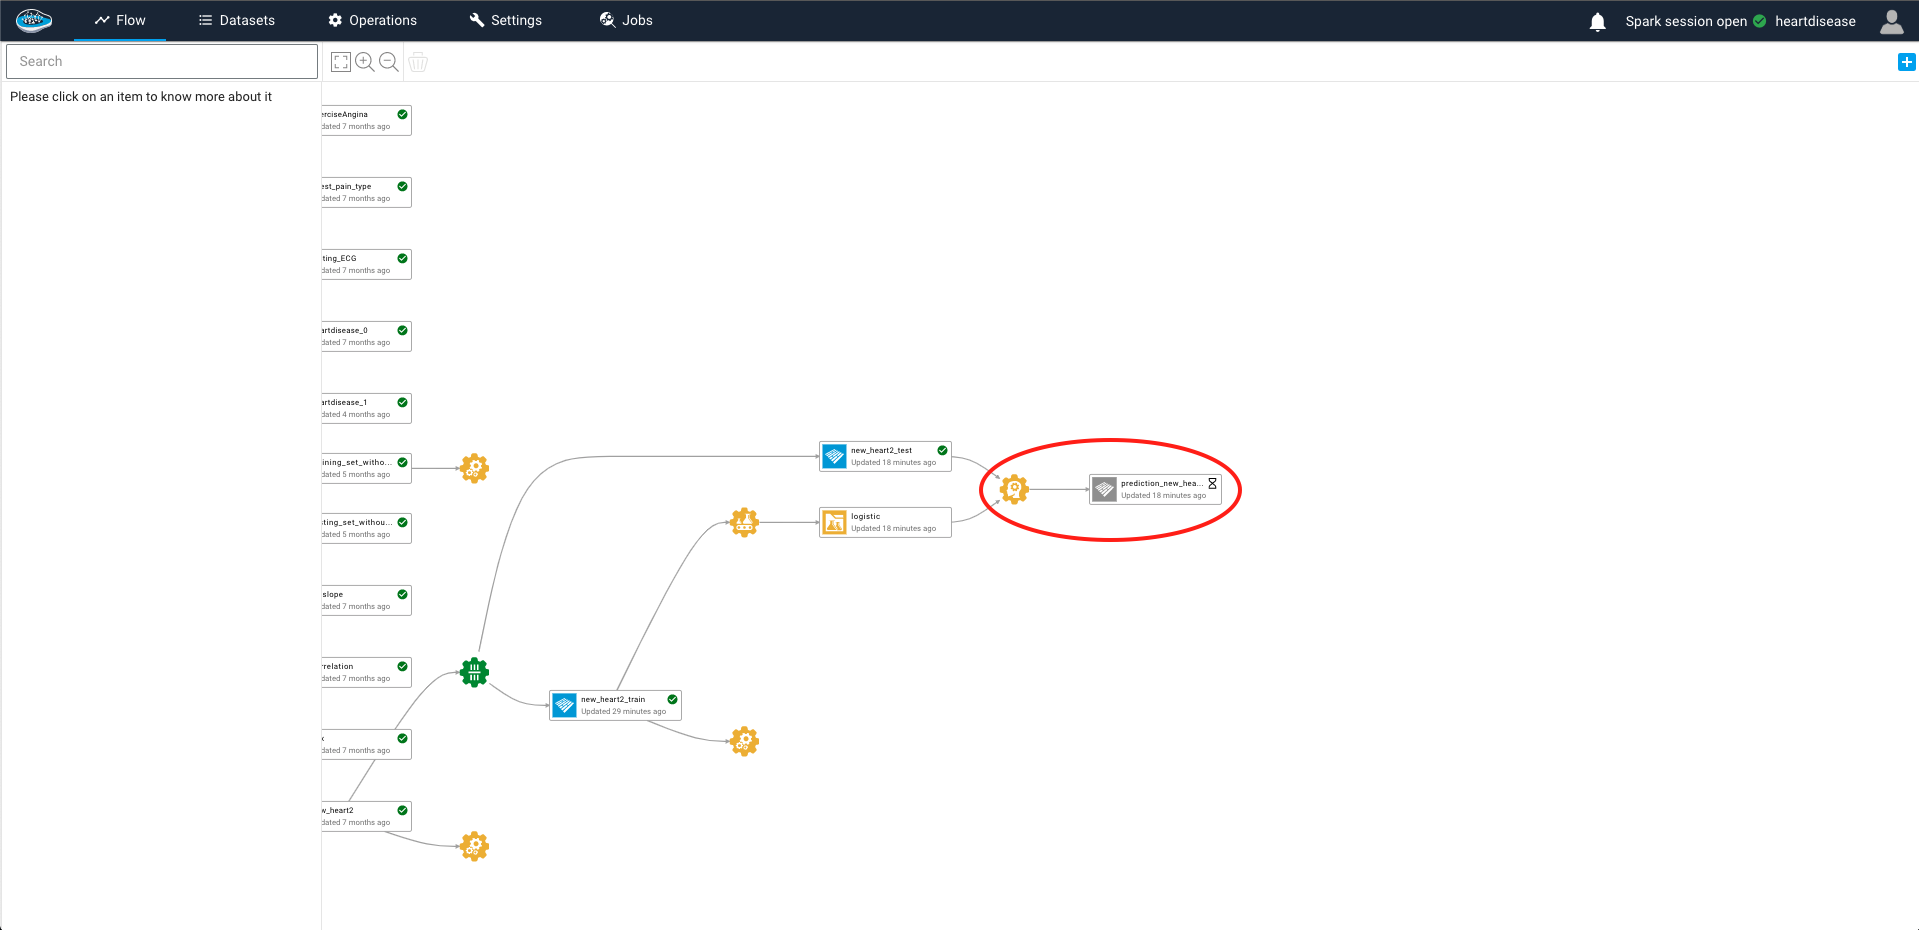
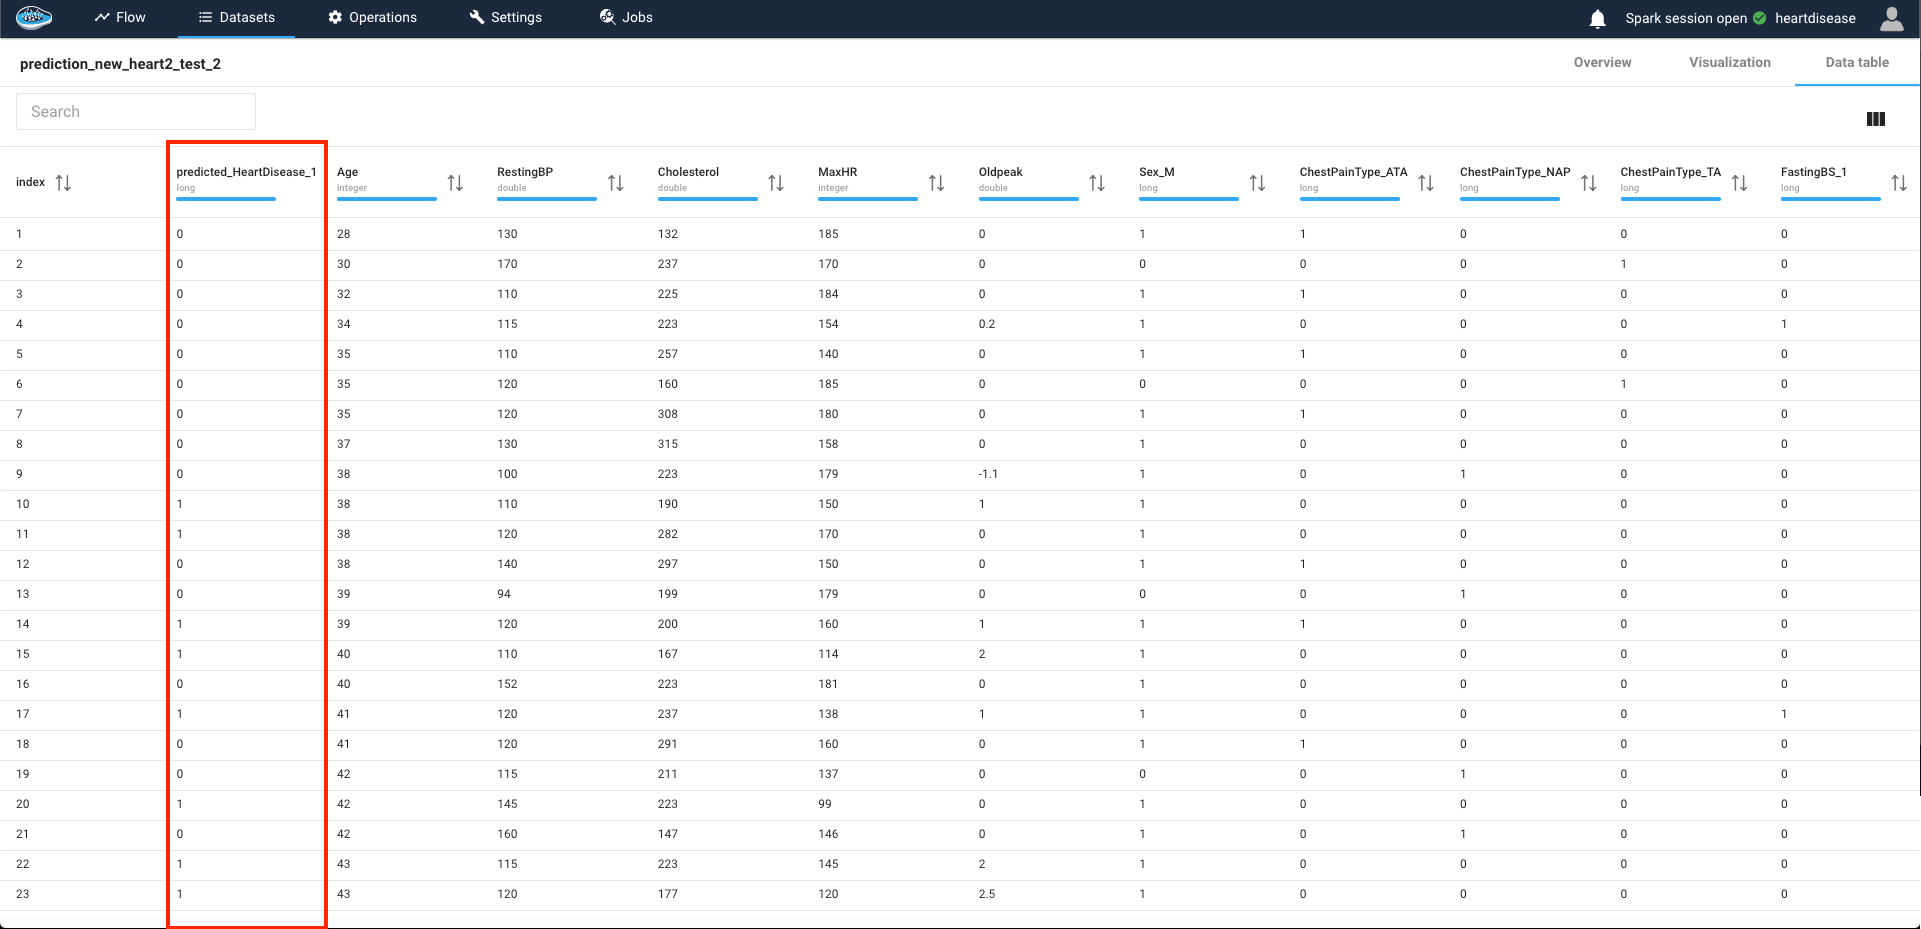
When you are all set, you just select the green Submit and Run button and the operation will be submitted and running, resulting an output dataset with the same schema including a column with the predicted target.
Even though we allow you to look at the predictions results, you are also able to understand in-depth the decision made by the model individually, the same as the Interpretability module but for each row. This feature is called the Local Interpretability.
Local Interpretability
This feature is accessible by clicking one of the rows from the Prediction operation output dataset and will appear a panel describing the prediction results and some tools to understand why the model has taken this decision for the prediction rather than another option.
SHAP values
This insight is derived from the SHAP (SHapley Additive exPlanations) values, a powerful tool that assesses the influence of individual feature values within a row on the final prediction. A positive SHAP value signifies a propensity towards the positive class, while a negative value indicates a lean towards the negative class, creating a comprehensive understanding of the predictive dynamics.
Furthermore, expanding on this concept, you have the flexibility to modify certain existing values. This adjustment enables you to observe shifts in the resulting probability and potentially even alter the final prediction. By actively engaging in this process, you gain a deeper comprehension of the intricate mechanics underlying the predictive model's decision-making process.
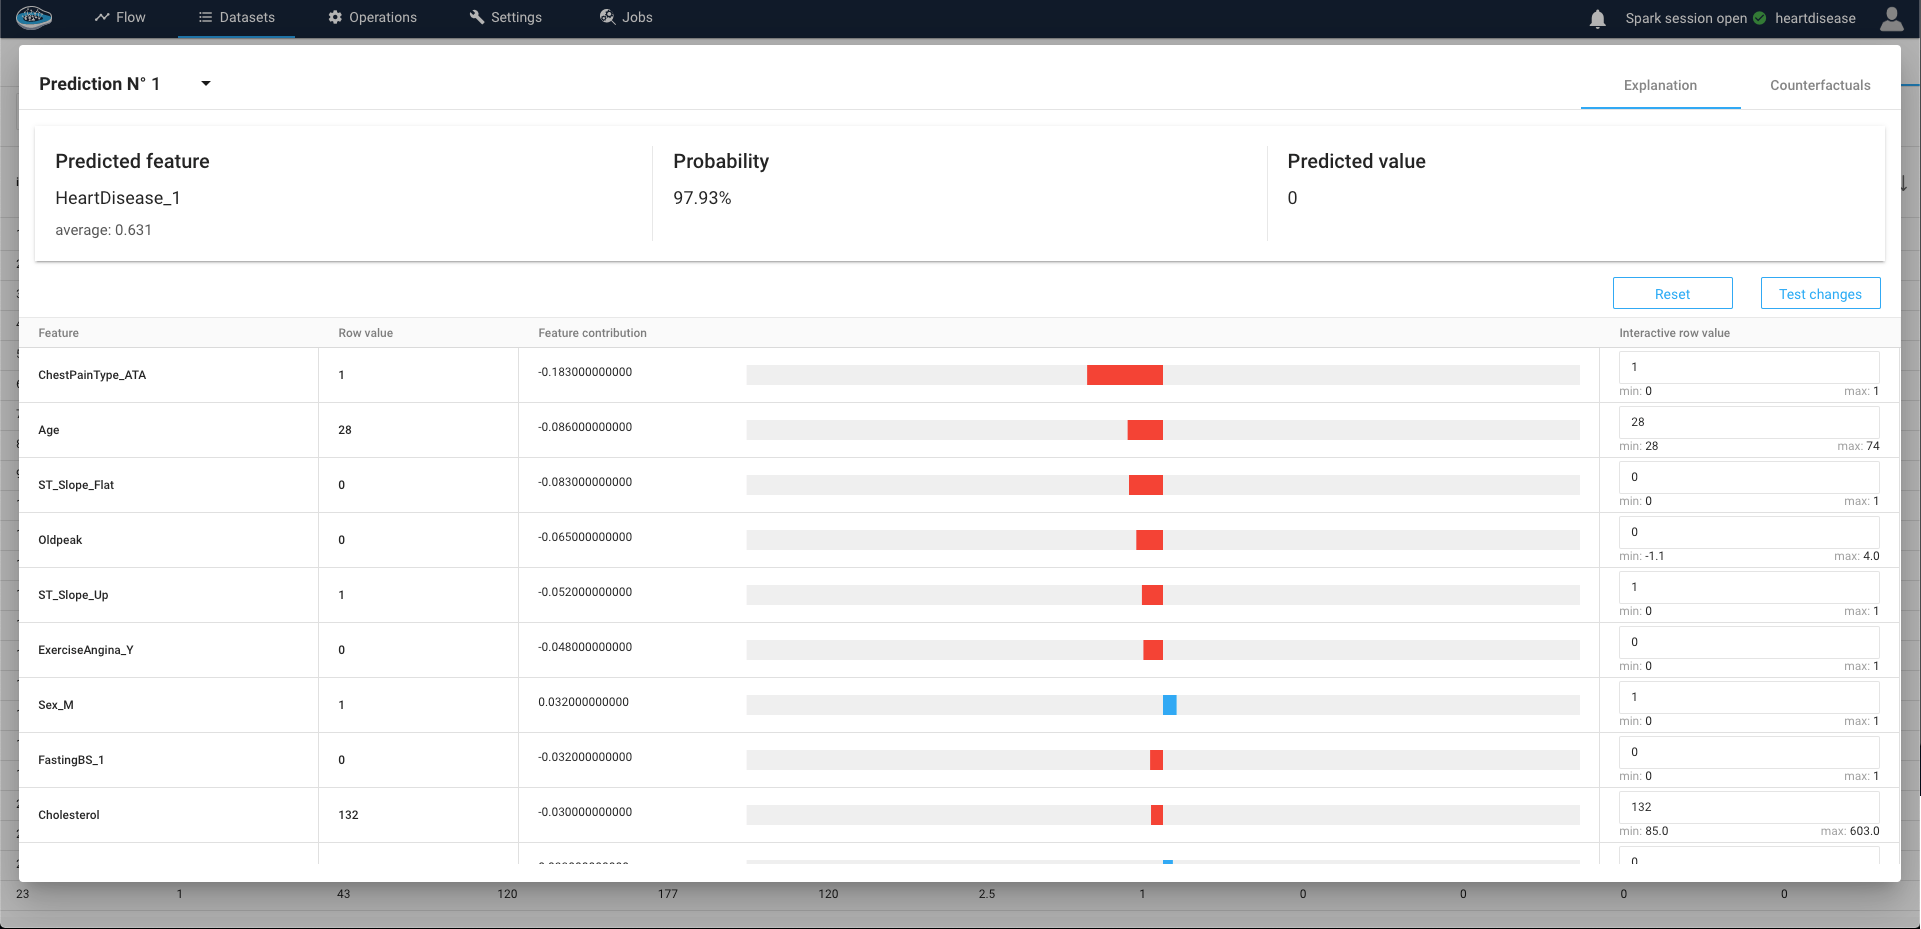
Not only you can visualize the effects of the feature but you can also submit some changes to some feature values in order to test "what if?" hypothesis to get another predicted value rather than the original one.
Counterfactual Explanations
Facilitating this capability is the ingenious Counterfactual Explanations module, seamlessly accessible via the second tab within the interface. Navigating through this feature is straightforward: for Classification scenarios, you designate your preferred prediction outcome, whereas in Regression scenarios, you define a range of values. The algorithm then furnishes you with an array of options, meticulously tailored to your specifications, offering a holistic perspective into the intricacies of the model's reasoning process.
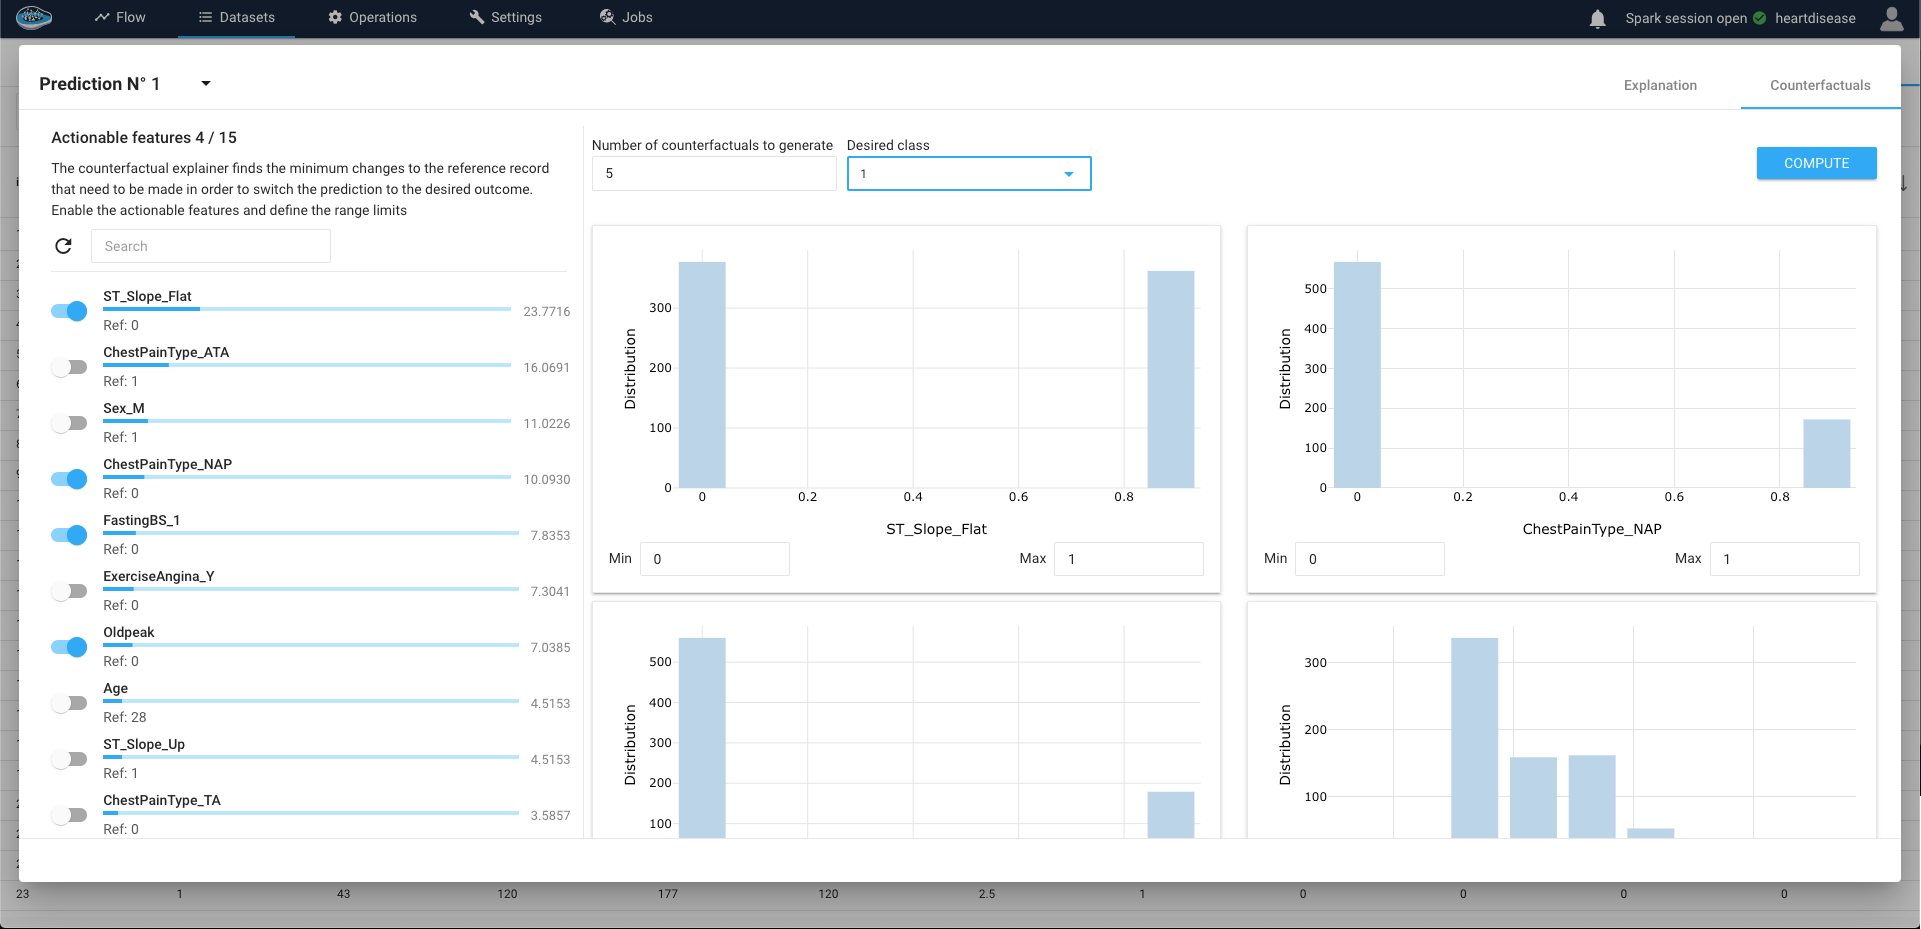
Afterwards, you select a number of features used in the model and a certain number or range of options from each selected feature (numerical or categorical) then when finished tuning up, you click on the Compute button to run and display the results.
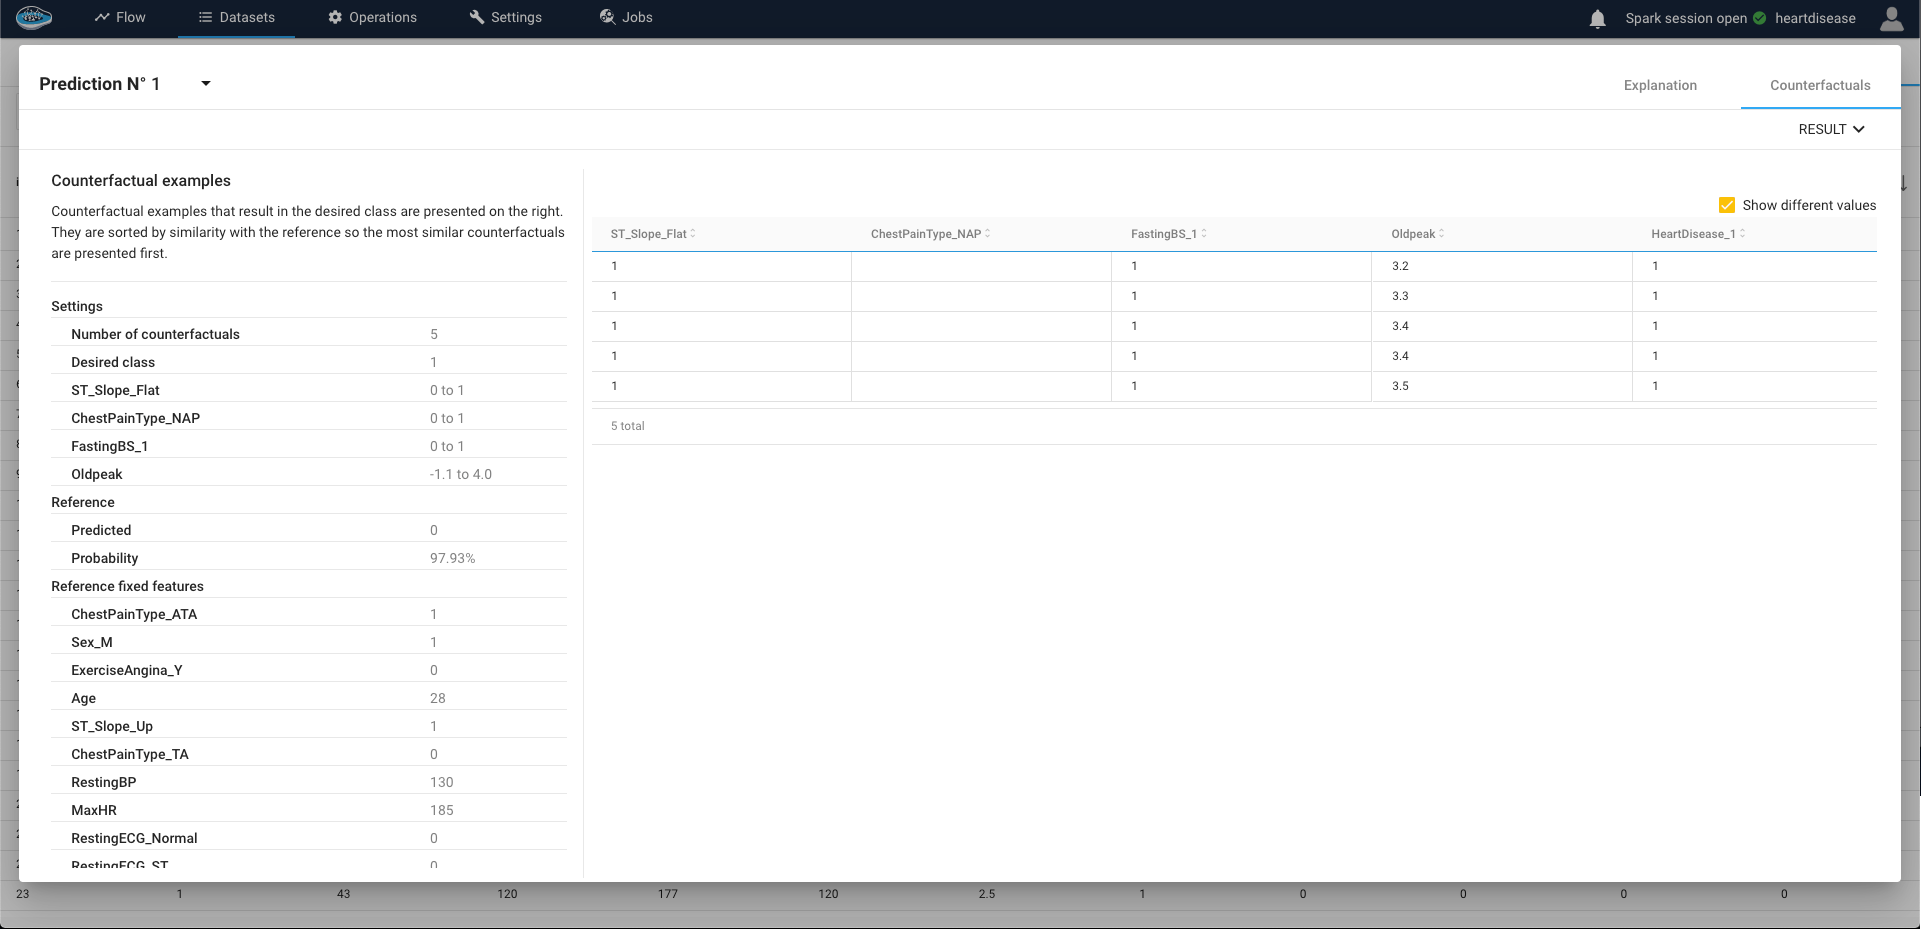
Tip
If you want to show only the changed values for each feature to understand the differences with the original input, you just tick the Show different values box on the top right of the table.
This tool is a great way for you to really understand what options you could have changed to assess a certain decision rather than another intuitively.
Through these set of tools, you can finally assess the right model to choose from this ML workflow and deploy it for your business processes.
Example
For a business case, you can look for a credit demand from a bank that was refused and understand what conditions (i.e. features) can be changed in order to get it accepted.
You can learn more about this through our Academy in this Customer churn tutorial
Warning
Some examples can lead to no results in the Counterfactuals since there is no option found by the algorithm. Retry by changing your selections.