Virtual Environments
papAI offers a diverse range of micro-services that work together seamlessly as part of its cluster, providing users with an extensive toolkit for their data science and AI projects. One of the key services available to all users is the basic Python environment, which comes with a set of essential libraries that are useful for coding.
While this default Python environment can be incredibly helpful, it may not always meet the specific needs of every user. For example, you might require certain custom libraries or want to import packages that aren't natively available in the standard Python service. To address this, papAI offers a custom Python virtual environment service that gives you complete control over your environment and enables you to fully customize your Python script's execution.
With the custom Python virtual environment service, you can import any additional libraries or packages that you need to run your code successfully. This flexibility allows you to include custom-built libraries, import packages that are not included in the list of available libraries on the regular Python editor, and take advantage of other useful tools that might not be present in the basic environment.
Technical specifications
As a platform designed to industrialize assets as services, papAI understands the importance of seamless and efficient deployment processes. That's why the creation of a custom Python virtual environment is not only possible but also easy and automated within the platform. This means that the virtual environment you create will be automatically deployed as a service included in the papAI services' cluster.
Moreover, papAI provides users with an intuitive interface that makes it easy to manage the CI/CD (continuous integration/continuous deployment) process of their newly created virtual environment service in just a few clicks. This streamlined approach to deployment allows users to focus on their AI projects, rather than worrying about the technical details of service deployment.
Another advantage of papAI's custom Python virtual environment service is that users can manage multiple virtual environments simultaneously. This means that you can create and install different libraries for each virtual environment, including custom packages, without worrying about conflicts or dependencies between different projects.
By automating the deployment process and providing an intuitive interface, papAI makes it easy for the user to focus on what really matters : building and deploying successful AI solutions.
Info
Since it's a service, it also means to a certain extent that this environnement can be exported in order to be used elsewhere if needed.
Create a new virtual environment
Please note that only users with administrator privileges on a papAI project will be able to access and manage virtual environments
If you don't have administrator privileges, you will need to contact your project administrator and request the necessary permissions.
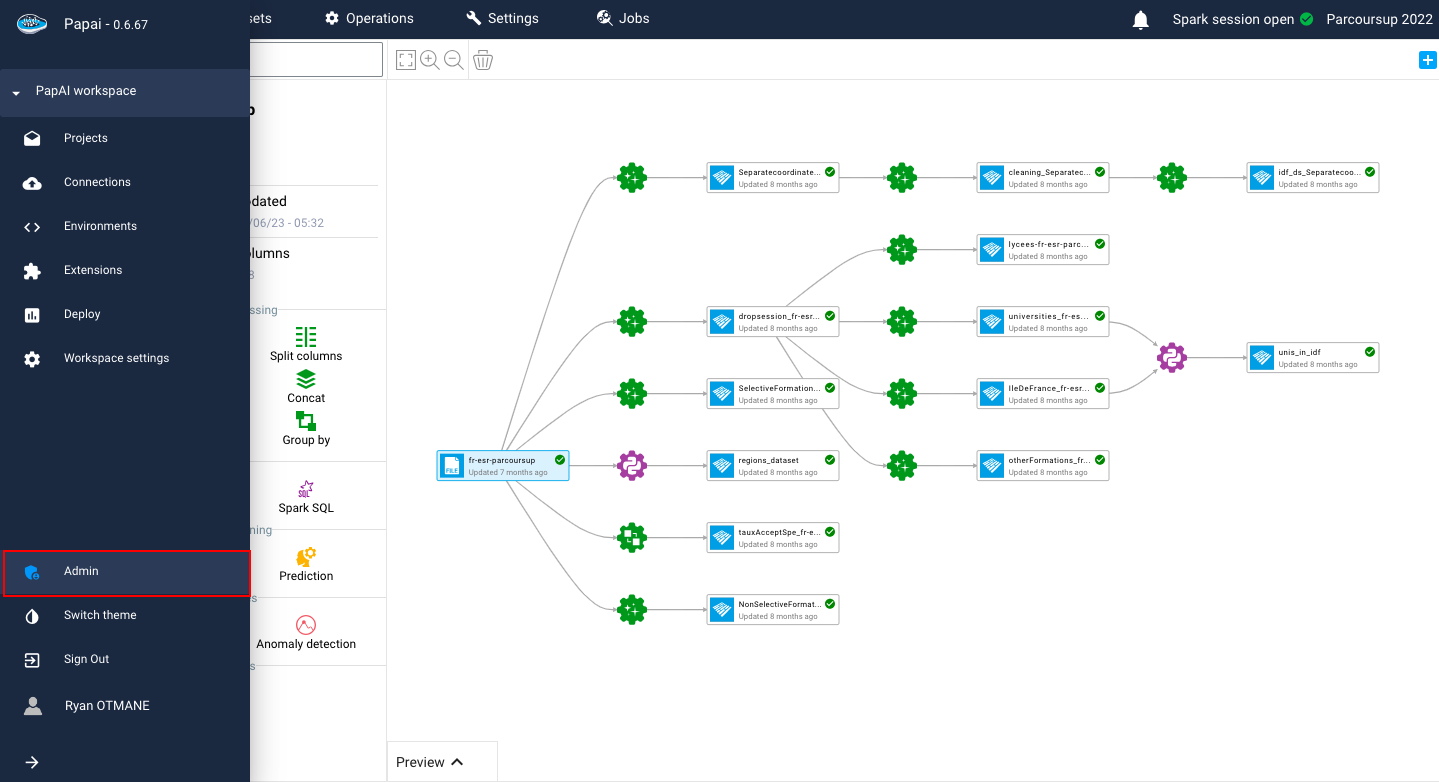
As an admin on the papAI platform, you have full control over every aspect of the platform, including the creation and management of virtual environments. Accessing this feature is simple: all you need to do is select your profile picture in the top-right corner of the platform interface to trigger the dropdown list, and then click on the Admin option.
Once you have entered the Administrator menu, you will have access to a range of additional settings that allow you to manage your projects with ease. One of the key features available to you is the virtual environment interface, which allows you to create and manage custom Python environments for your projects.
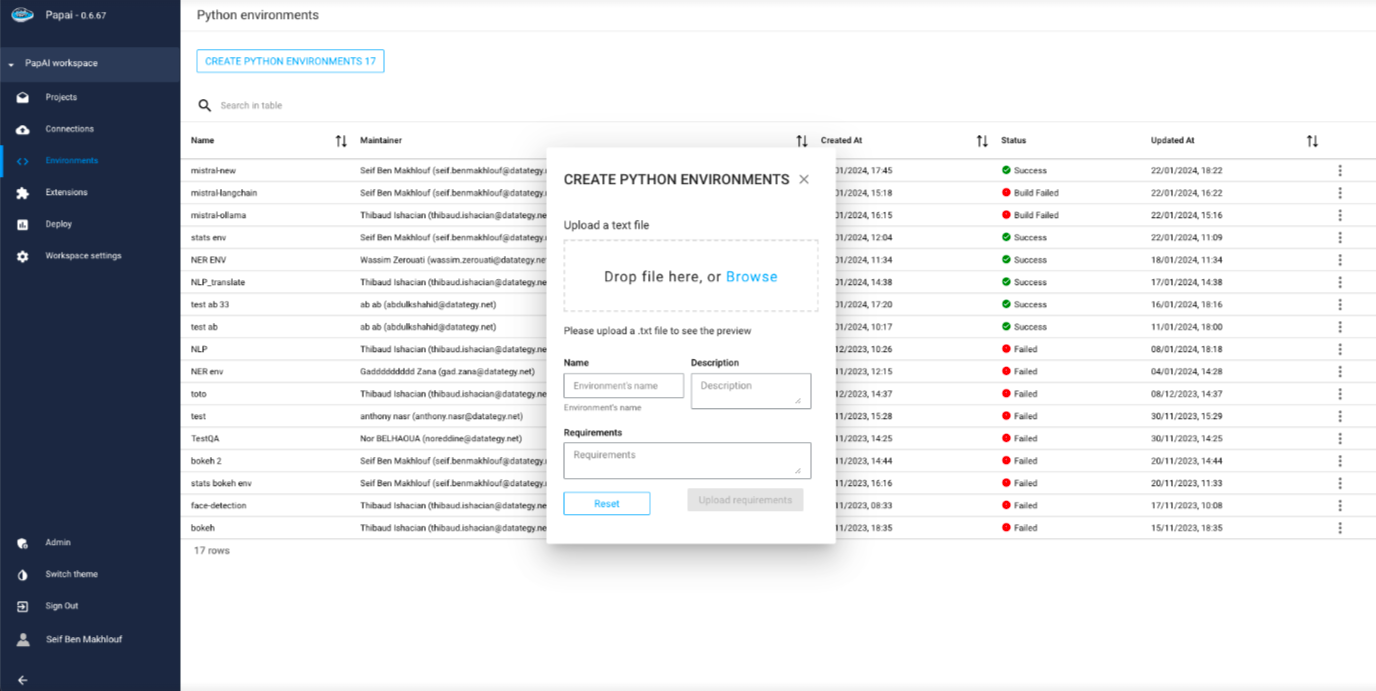
To create a new environment, simply select the Python environments tab, followed by the Create environments option. This will open a simple form that you can fill out to initiate the process of creating your new environment. The form includes several key fields, including:
- A space where you can drag and drop or upload a TXT file containing your Python library requirements according to your needs. This allows you to quickly and easily import all the libraries and packages you need to get started with your project.
- A name for your new environment, which will help you to identify it quickly and easily.
- An optional description of your new environment, which will help other members of your team understand its purpose and intended use.
Tip
When creating a new virtual environment in papAI, it's important to ensure that all the required libraries and packages are included and that there are no errors or conflicts. That's why papAI provides you with a field to check whether the platform has correctly read every library or package added to your requirements file. This allows you to easily identify and correct any errors before proceeding with the deployment process.
Once you have finished filling out the form and ensuring that all the necessary libraries and packages are included, simply select the Upload Requirements button to initiate the automatic deployment process for your new environment. This process is designed to be seamless and efficient, ensuring that your new environment is ready to use in no time.
Once your new environment has been deployed, it is ready to use for either recipes or extensions, giving you full control over your Python environment.
Warning
When creating a virtual environment in papAI, it's important to ensure that your requirements file is properly formatted to ensure that the deployment process works correctly. If your requirements file is not shaped correctly, it can cause issues during the deployment process and prevent your environment from functioning as intended.
To ensure that your requirements file is properly formatted, it's a good idea to follow some best practices. For example, you should ensure that each library or package is listed on a separate line, and that you include version numbers or version constraints to ensure that you get the correct version of each library or package.
Manage your environments
Only possible if you are an administrator on a papAI project
If it is not the case, check with your administrator if you have the right rights.
Once you have successfully created your custom virtual environment in papAI, you can easily manage and access it using the platform's intuitive interface. To view your newly created environment, simply navigate to the View Environments tab, where you will find a comprehensive list of all the environments available on the platform.
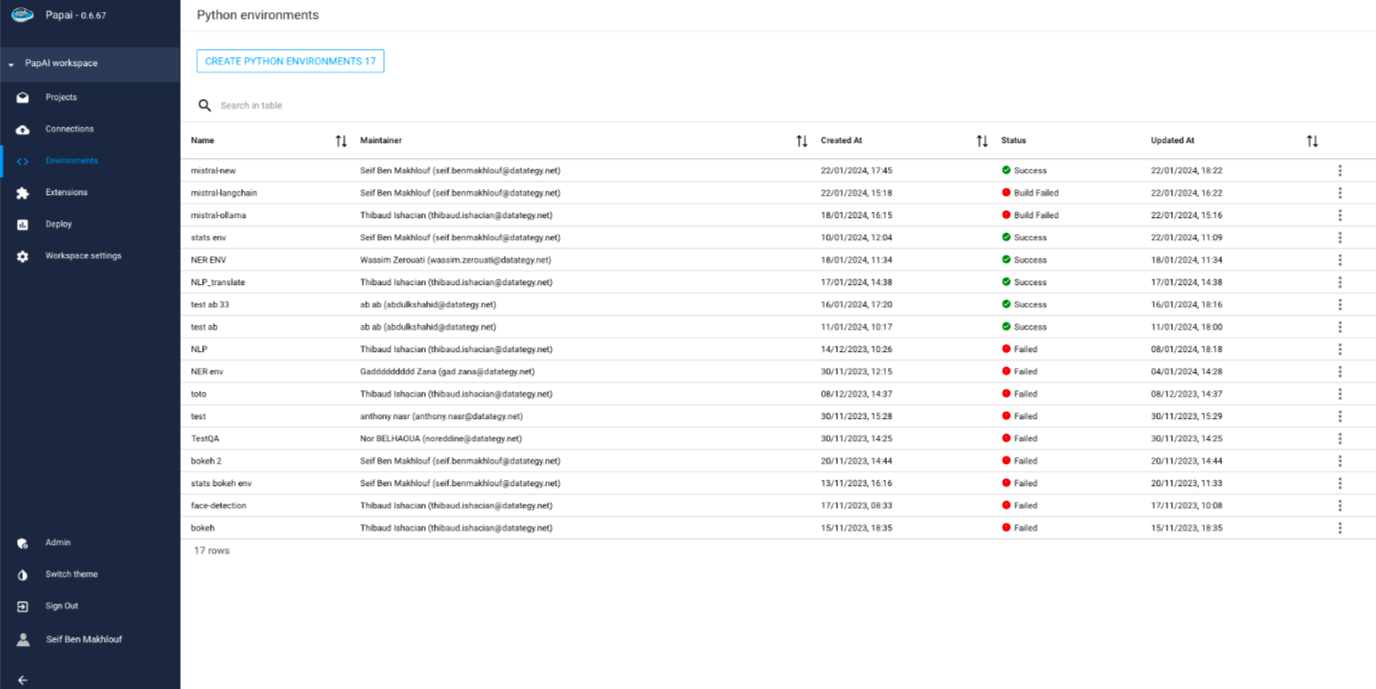
In this list, you will be able to see important information about each environment, including its name, the contributor who created it, and the dates of creation and update. This makes it easy to keep track of your environments and ensure that they are up to date and functioning correctly.
Tip
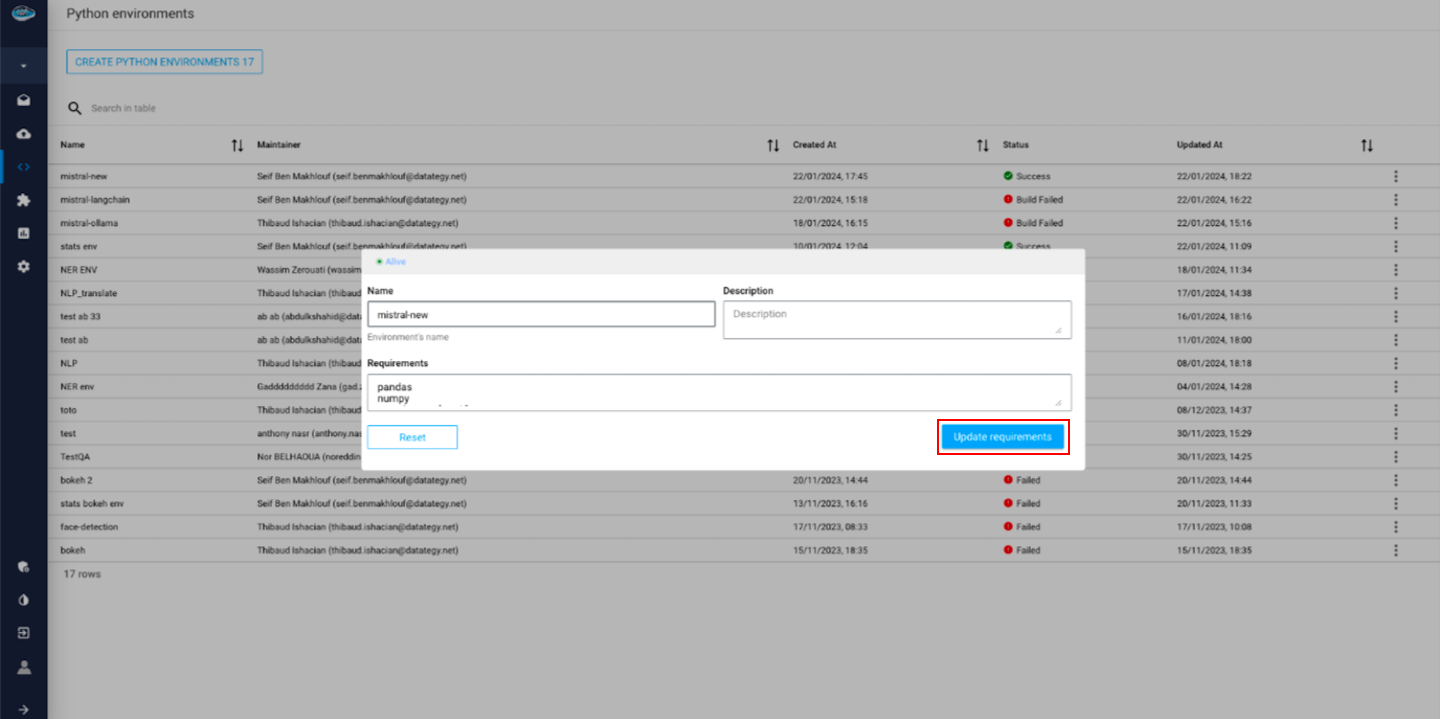
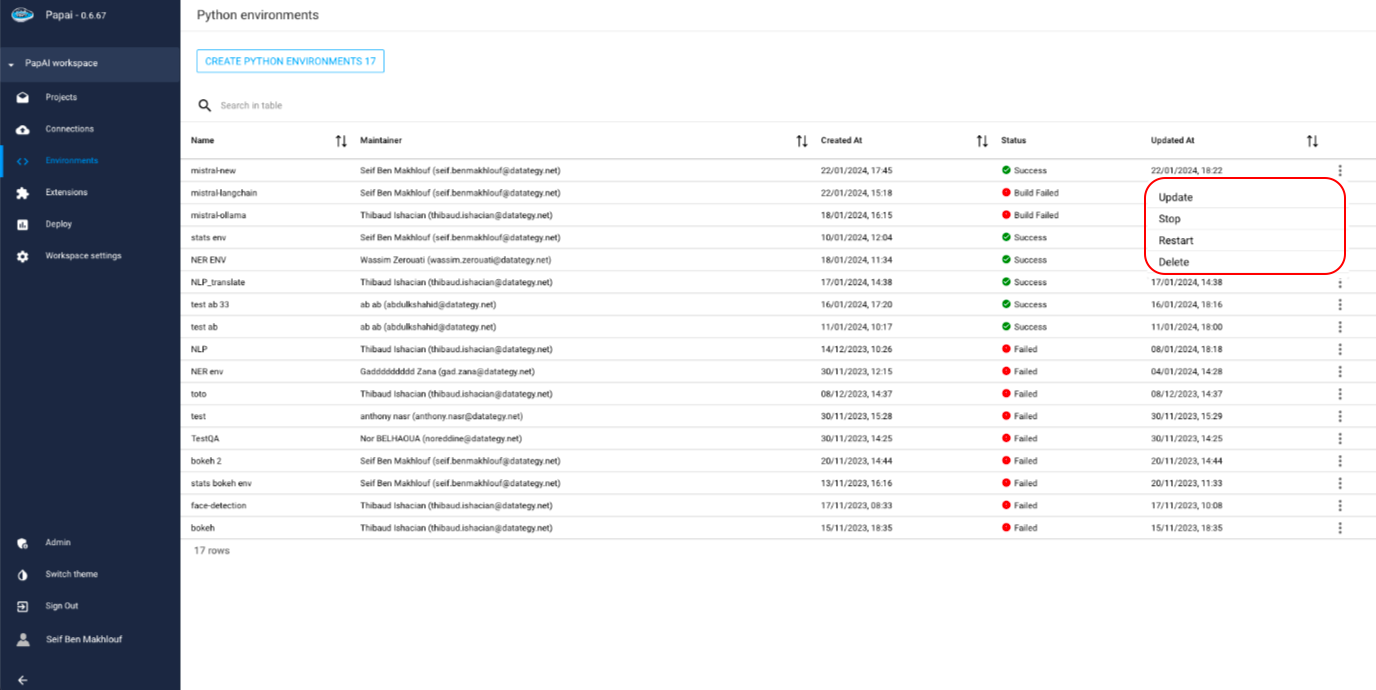
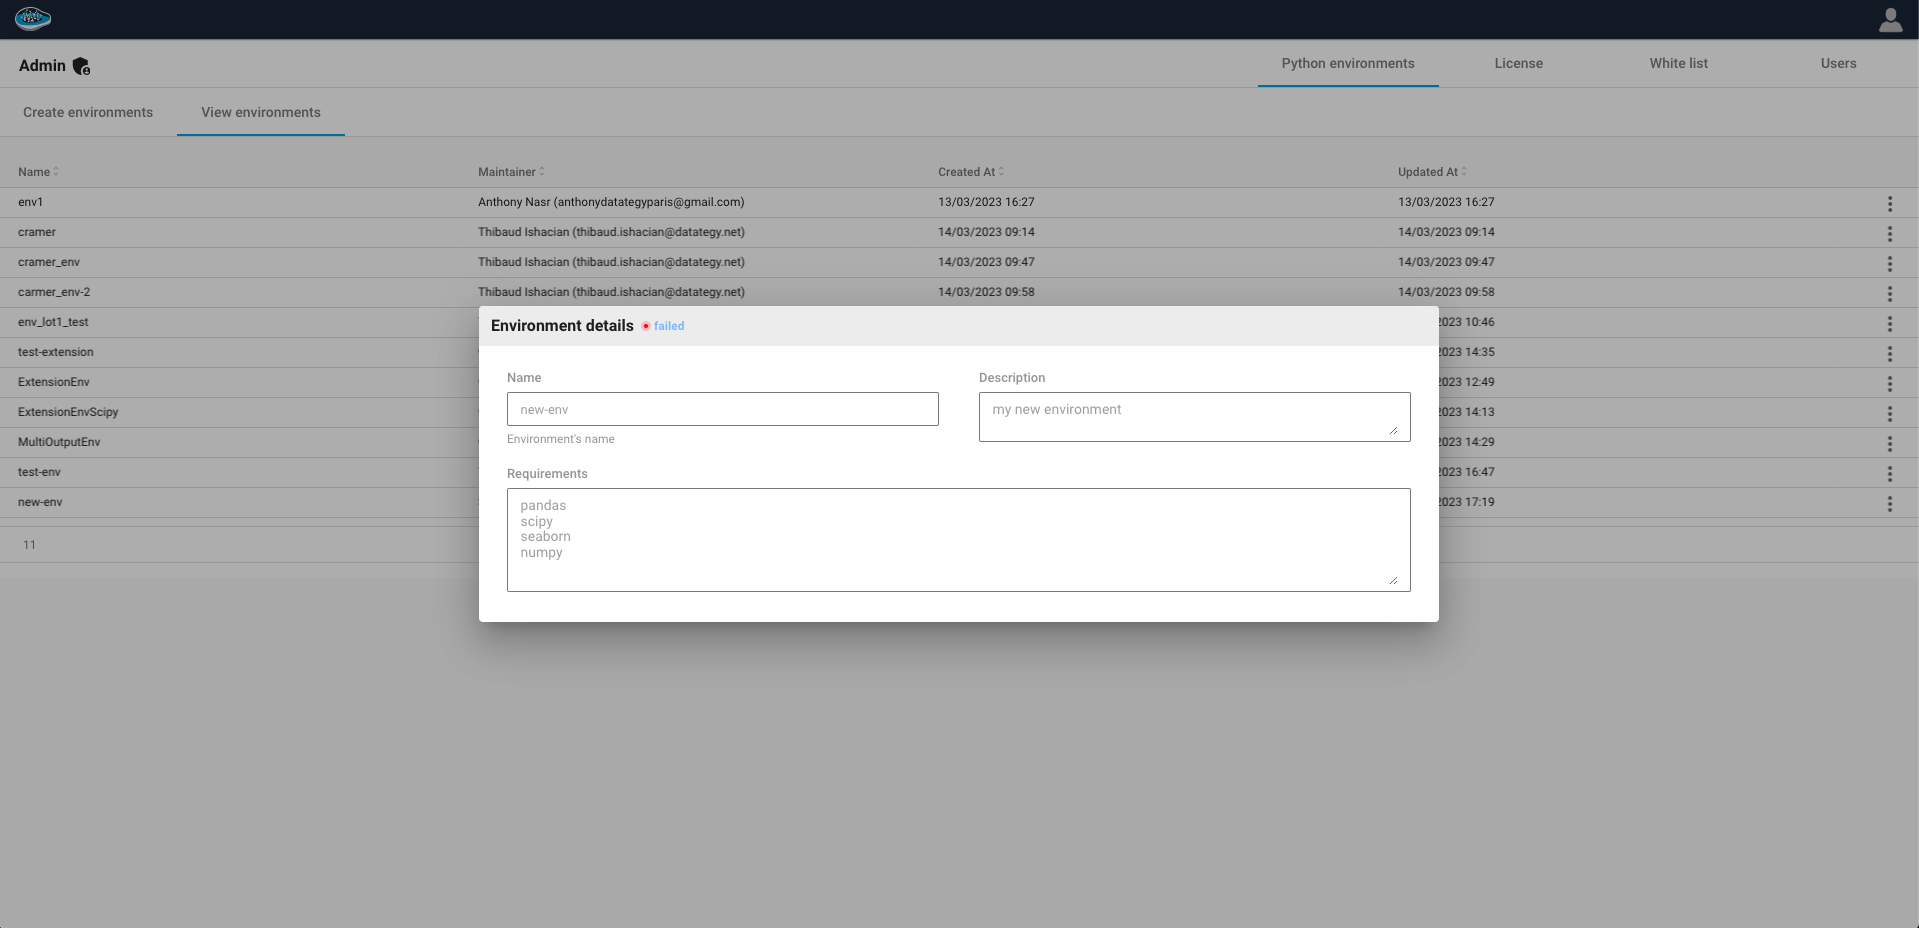
If you want to dive deeper into a specific environment in papAI, you can easily do so using the platform's intuitive interface. Simply locate the environment you want to explore in the View Environments tab and look for the icon located at the end of the row. Clicking on this icon will reveal a dropdown menu, where you can select the View option to access more detailed information about the environment.
Once you have selected the View option, a small window will pop up with all the same information that you provided when creating the environment, including its name, description, and list of required libraries and packages. In addition to this, you will also be able to see the current status of the environment, indicating whether it is currently active or not.
Use your environments
You can use an existing environment either if you are a collaborator or an admin of the project
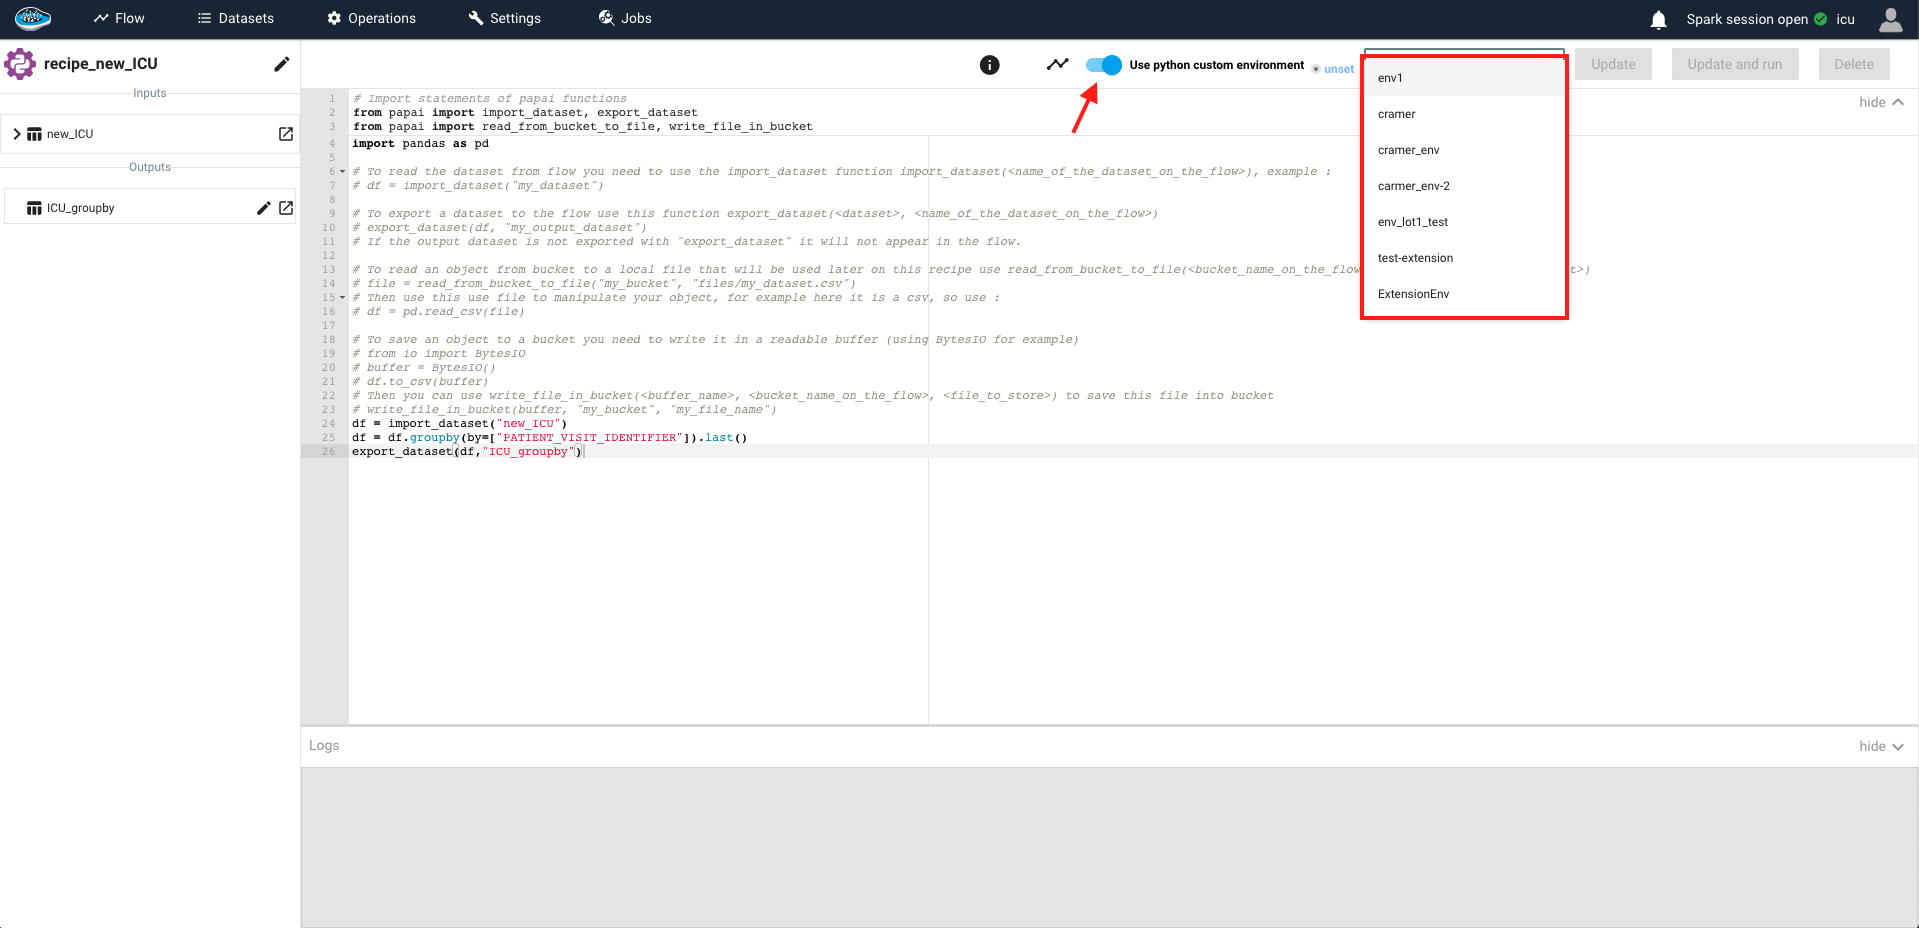
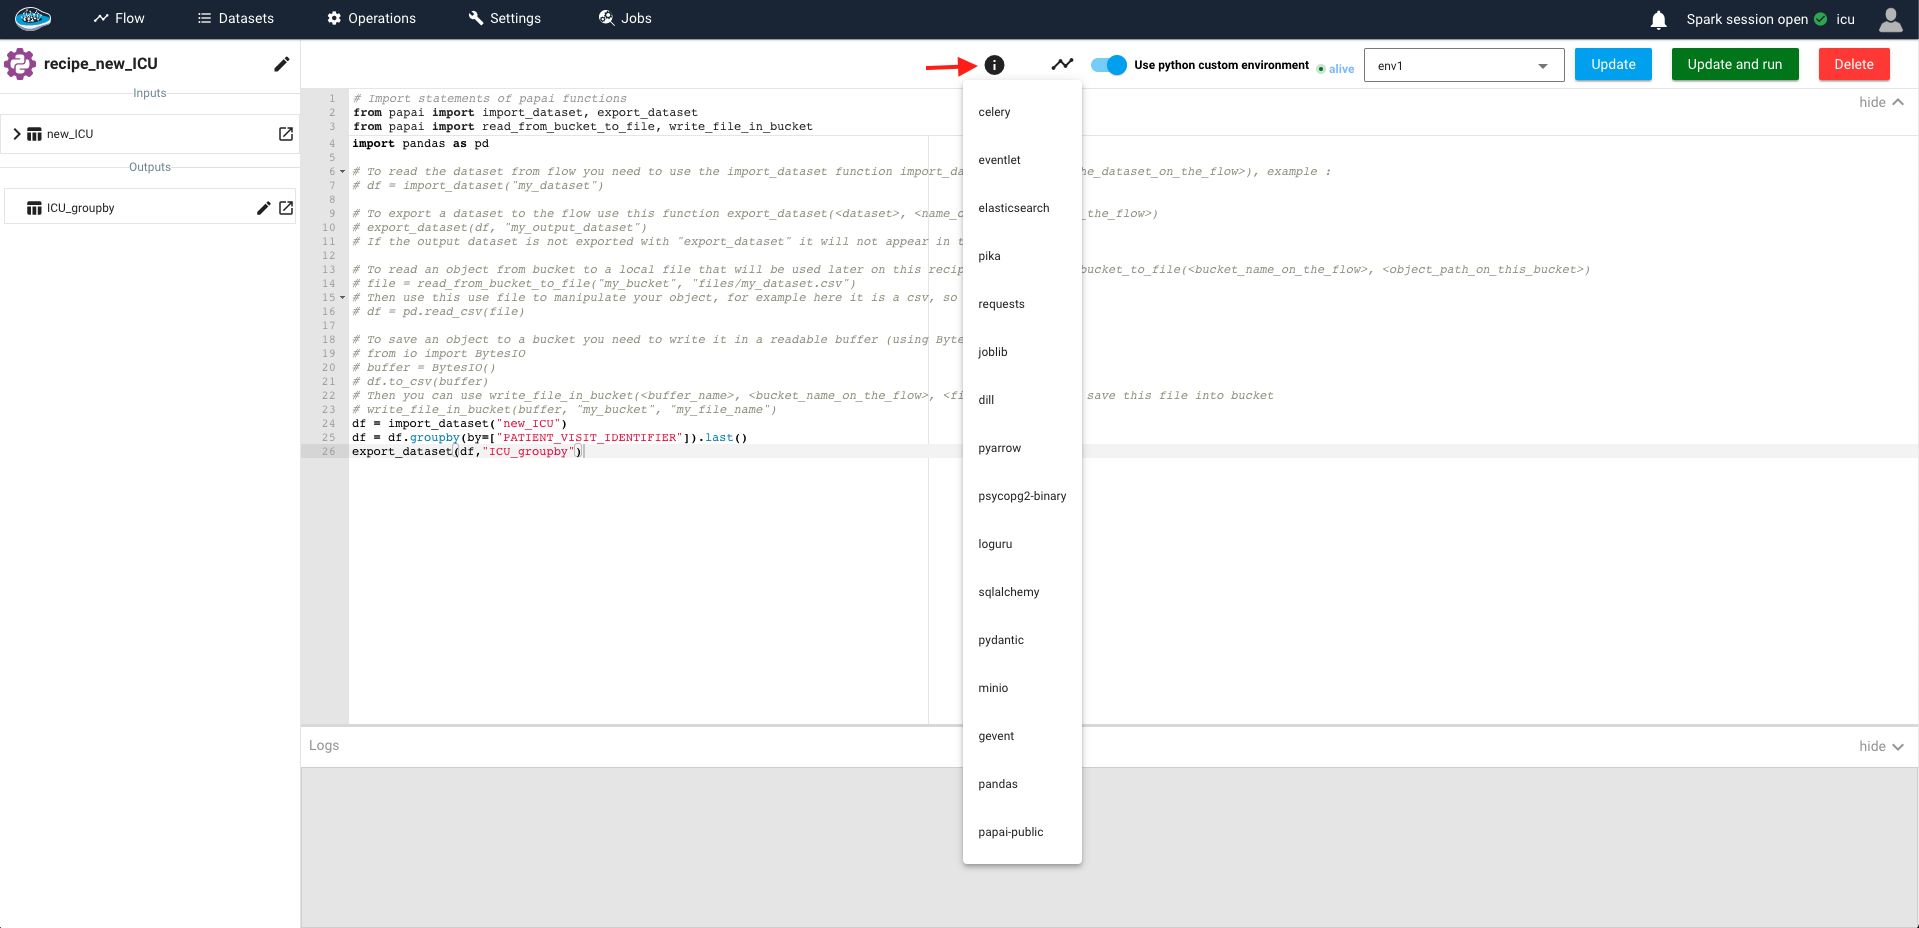
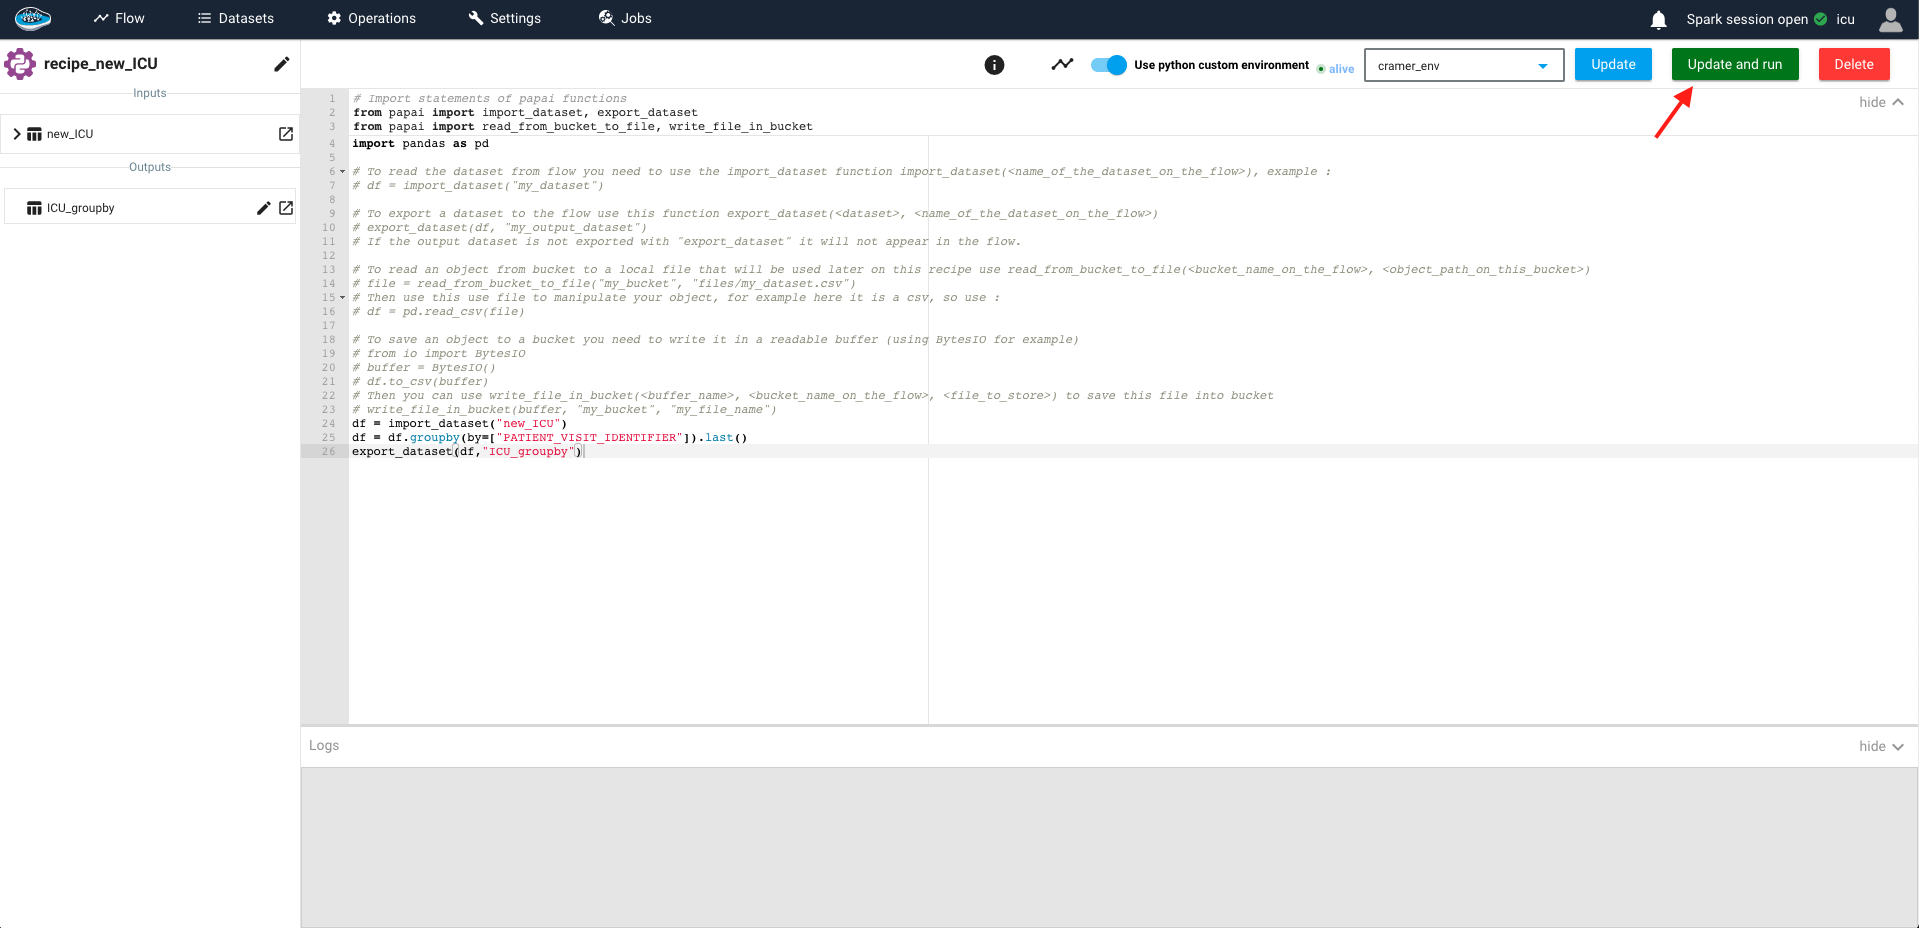
When working with Python recipes or Extensions on papAI, you can easily utilize any existing virtual environments that have been created on the platform. To do so, simply navigate to the recipe editor and switch on the Use Python custom environments button. This will allow you to select an existing environment from the dropdown list.

Once you have selected the environment you want to use, you can check its status and list of installed libraries by clicking on the :info: icon next to the environment name. This will provide you with all the information you need to know about the environment, including its name and list of installed libraries and packages.
Warning
If the selected environment is not available when running the recipe, it will fail without a sanity check whereas in a regular Python recipe, the error will be explicitly exposed to the user.
With the environment selected and confirmed, you can now proceed to write your Python code in the recipe editor as usual. When you're ready to run your code, simply click the Submit and Run button to launch your script using the selected environment.
The process for an extension is relatively the same. When creating an extension, the author has the option to specify the Python environment to be used for the extension. If the author has specified a custom environment, then that environment will be used by default when running the extension.
If you are using an extension and want to check which environment is being used, you can look at the extension details page which will display the environment name and a list of libraries installed in that environment. (only if you have the rights to do so)
Warning
If you want to use a different environment on an existing extension, you would need to contact the author of the extension and request that they update the environment used by the extension.
Note
Python recipe or extensions use by default the base environment on papAI but if you switched on the custom environment button and updated the recipe, the recipe will always use the selected environment.
Here is a demo using Python virtual environments